How to start taking online bookings and keep your day in order
With Bookings, clients choose the service, the day and the time themselves on your website, and you see everything in one calendar. You set it up once, from your website's admin panel. Then, day by day, you confirm, decline, add and move appointments in the Bookings panel, on desktop or on your phone.
What Bookings solves
You no longer spend time on the phone finding a free slot: the client picks one themselves, anytime, and you see the appointment in the calendar. You decide whether an appointment confirms itself or stays pending until you accept it. What you get and what it costs is on the Bookings page.
What to prepare first
The Bookings panel takes your services, team and hours from your website's admin panel. Fill them in there, under "My Business":
- Services & Prices: each service, with its duration and price.
- Team: who works with you.
- Opening Hours: the days and times you see clients. Write them with times, in the website's main language: the calendar is built from them.
How to turn on bookings
- In your website's admin panel, open Bookings. If you see a lock and the See the offer button, the add-on isn't on yet for your website. You add it from "My Account › What else you can add", with Add to Cart on the Bookings card (How to add a new add-on to your website).
- Click ⚙ Set-up.
- Open the "How booking works" section. Under Who confirms the booking, choose one of the two options: You (every appointment stays "pending" until you accept it) or It confirms itself, on the spot (good when the time is fixed).
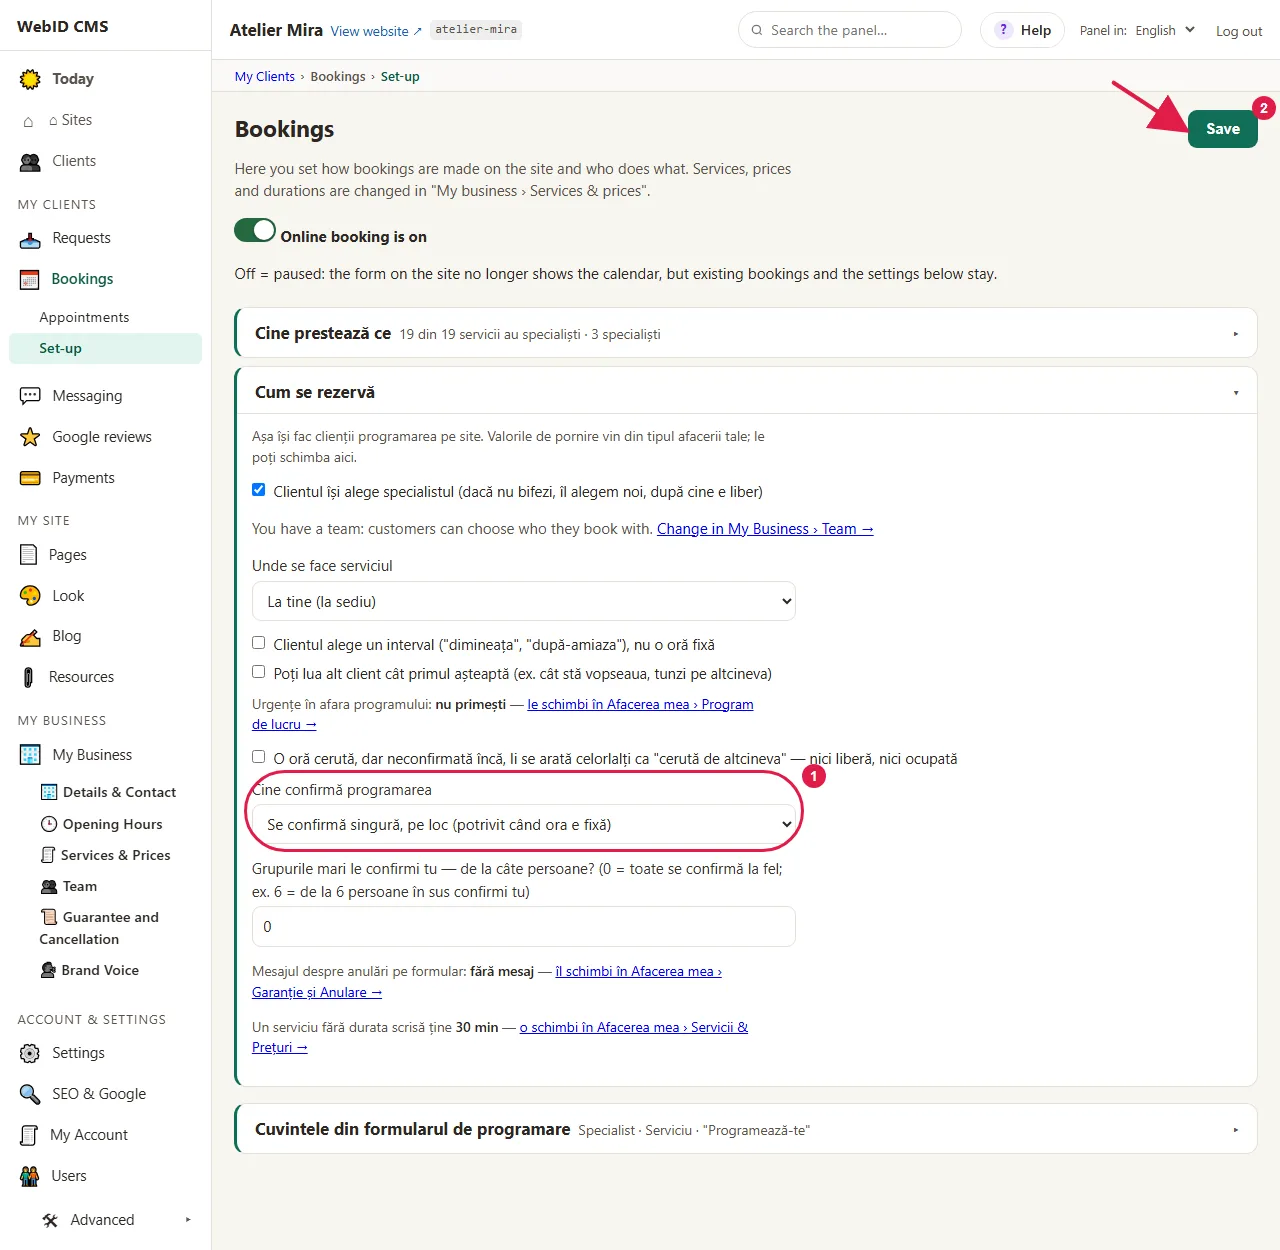
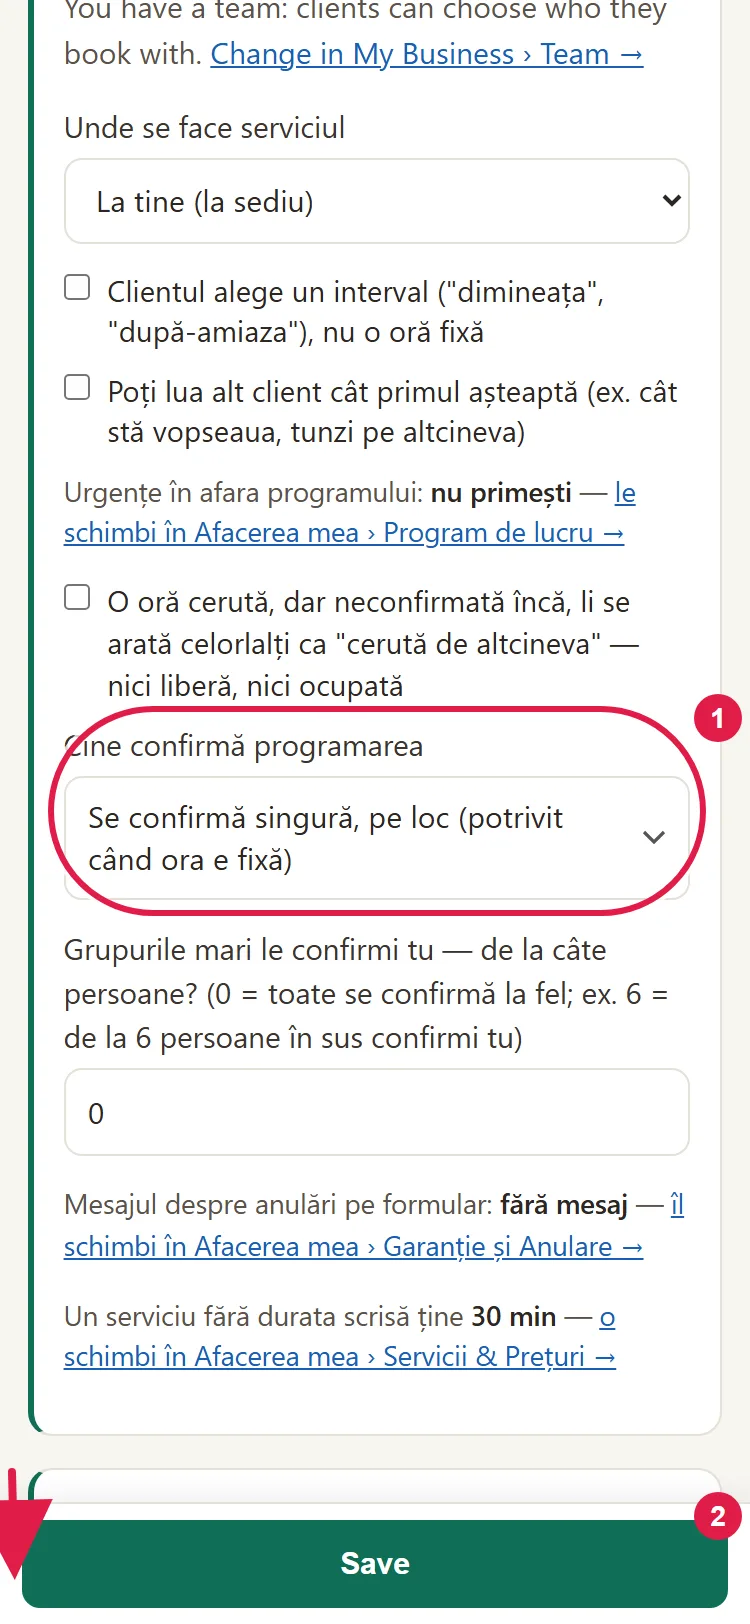
- If you take groups, under "You confirm large groups", write the number of people from which you want to confirm them yourself.
- Click Save. The settings reach the Bookings panel by themselves.
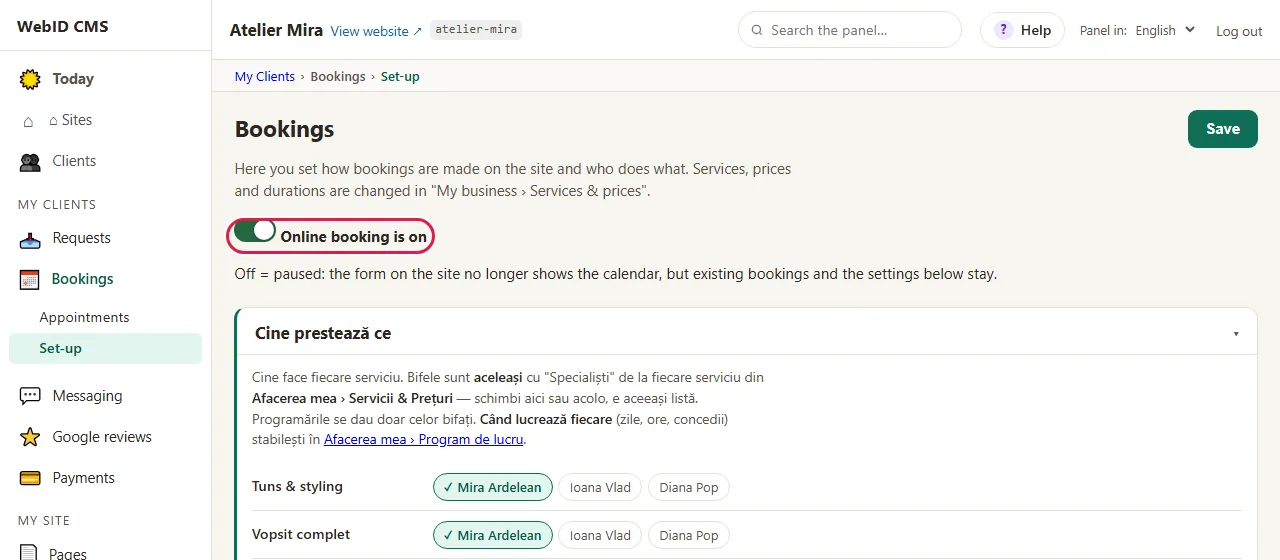
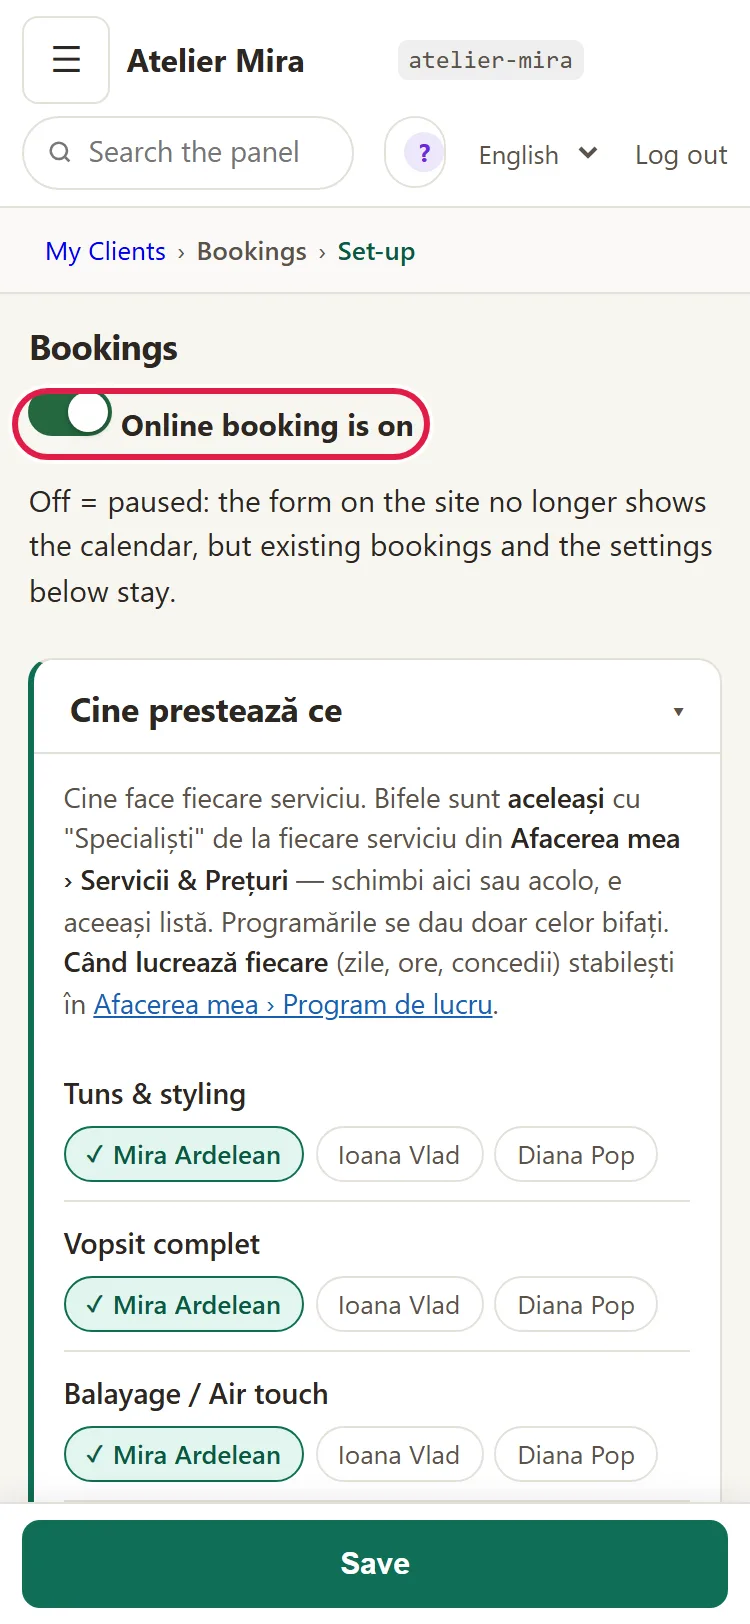
- At the top of "Set-up", turn on the Online booking is on switch and click Save.
- Open the booking page on your website and check the form: the client chooses the service, the day and the time.
At step 3, the option selected from the start depends on your type of business (for example, at a salon appointments confirm themselves, and at a dental clinic you confirm them). Appointments for a service marked in your website's admin panel as needing confirmation stay pending even if you chose instant confirmation.
Want a break? Turn off the switch from step 6. The form on your website no longer shows the calendar, but existing appointments and your settings stay.
How to get into the Bookings panel
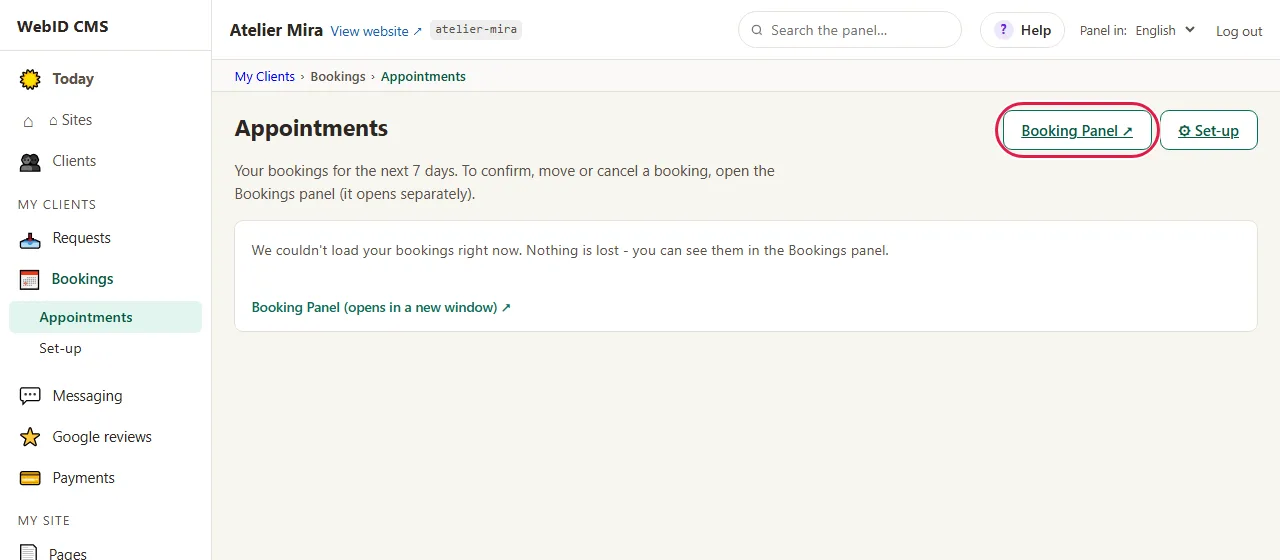
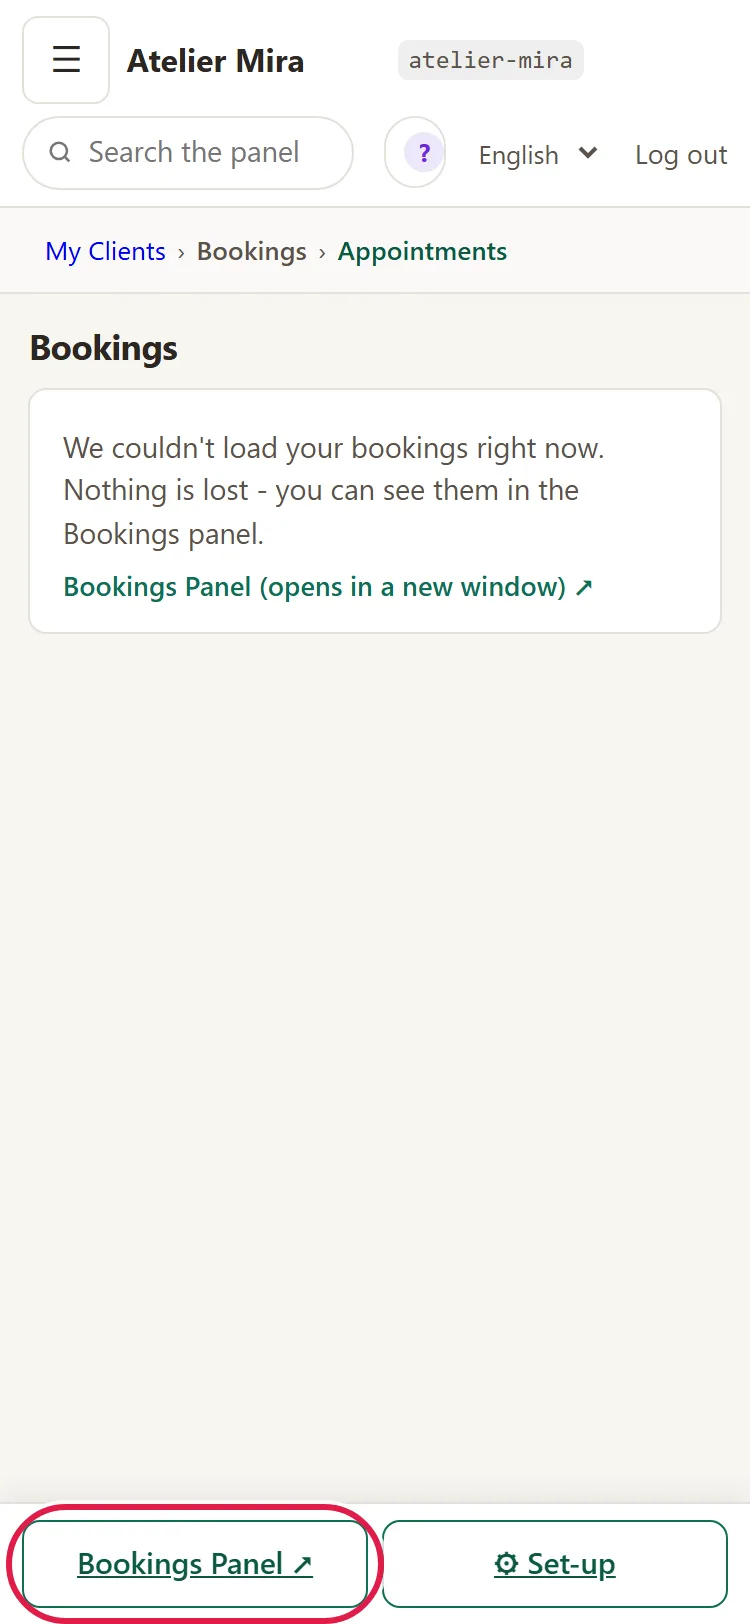
- In your website's admin panel, open Bookings › Appointments and click Bookings Panel ↗. It opens in a new tab.
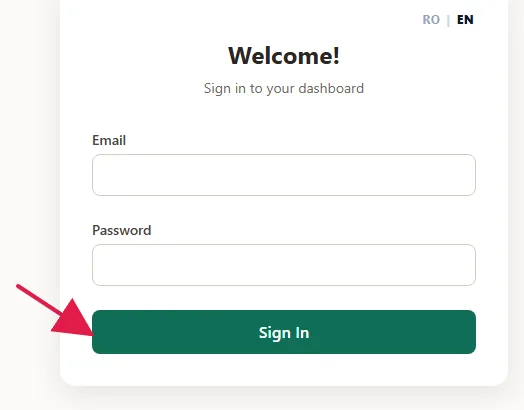
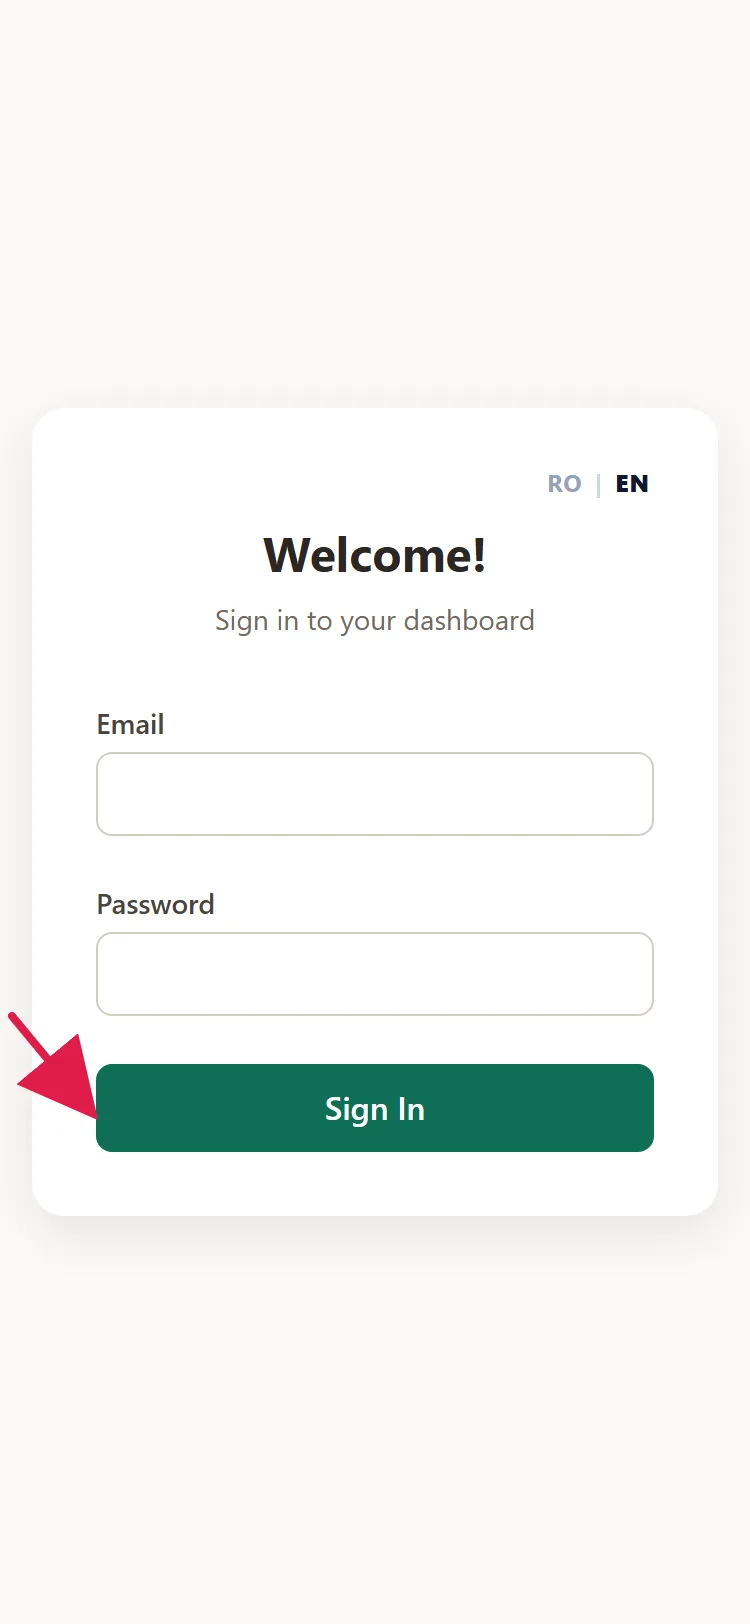
- If it asks you to sign in, type your email address under Email and your password under Password, then click Sign In. Your starting password came by email when bookings were turned on.
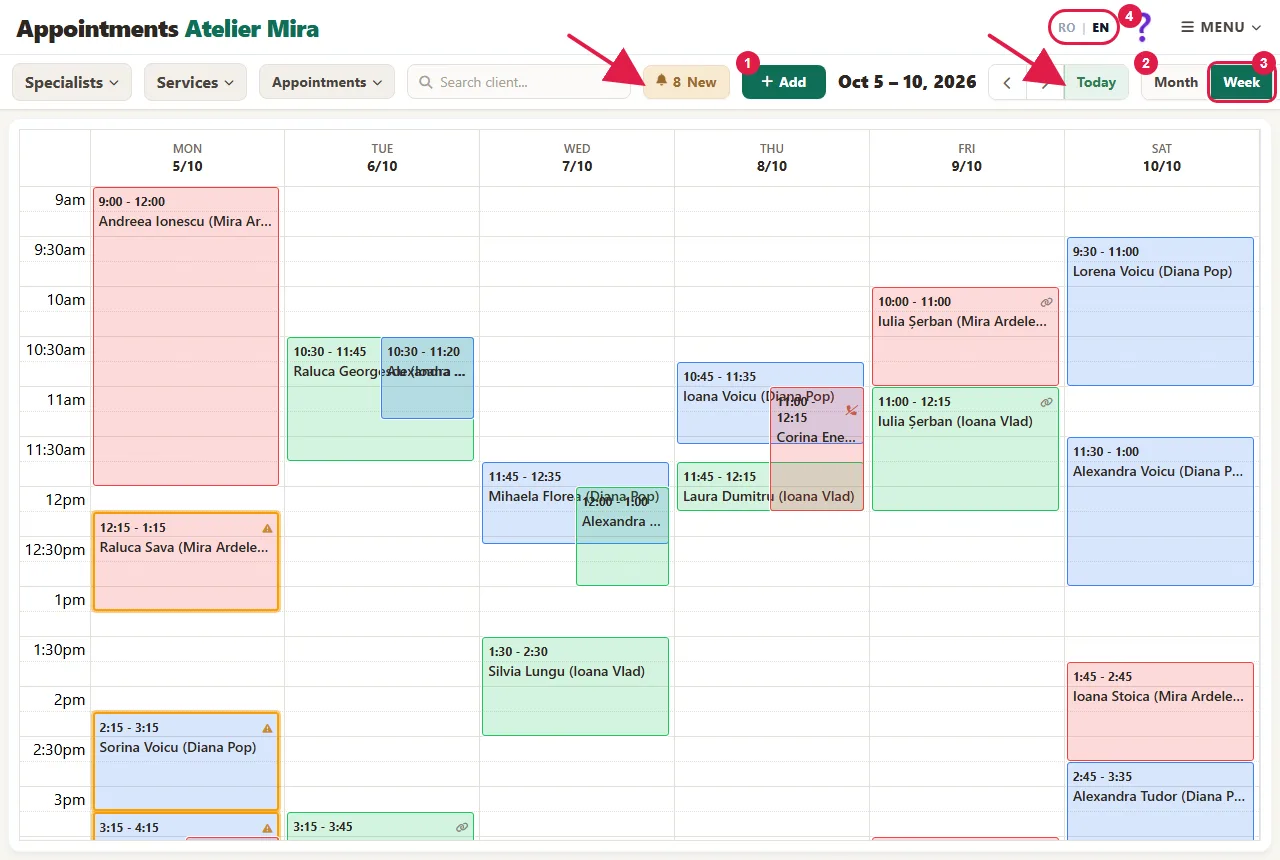
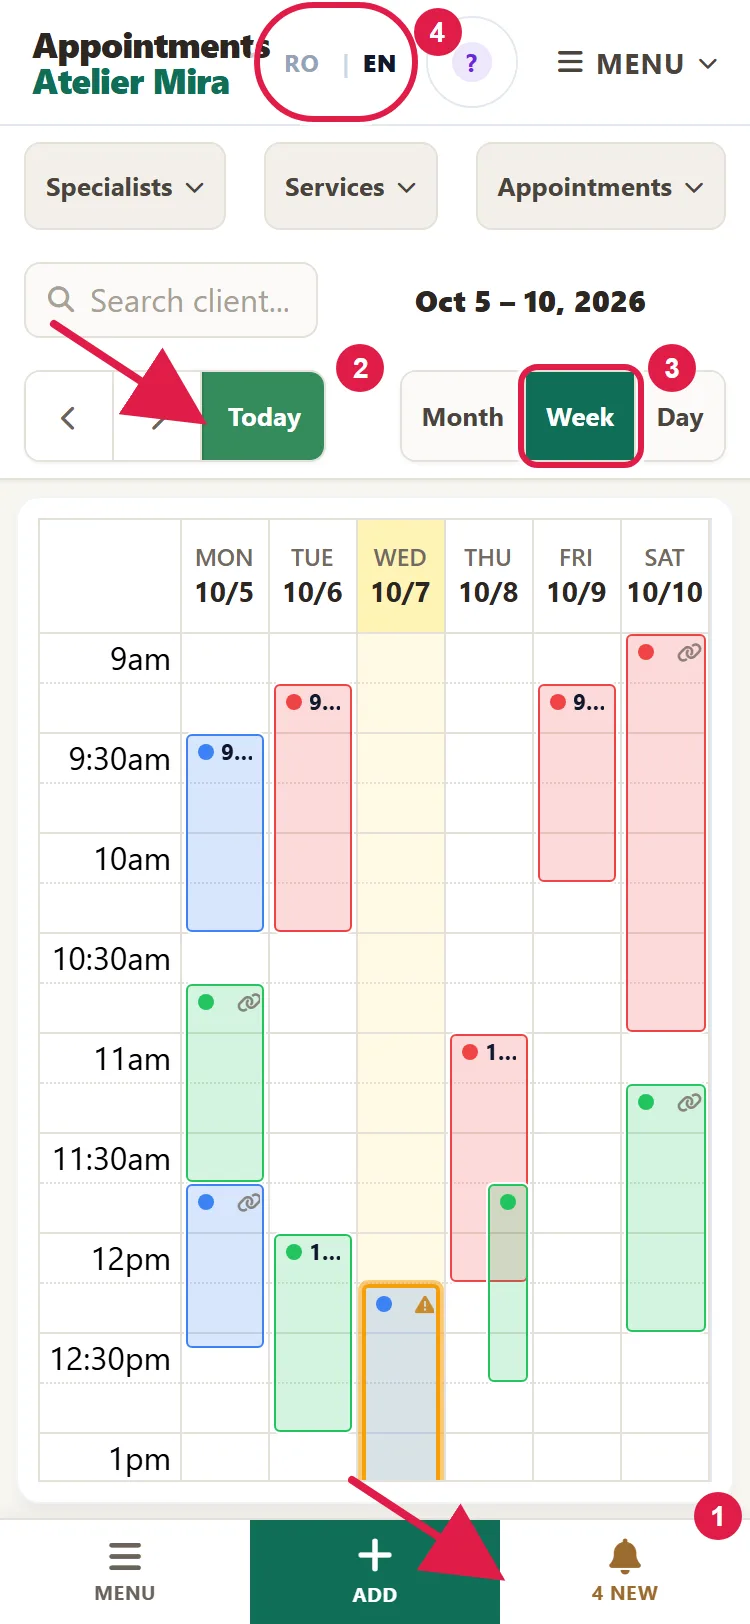
- The calendar opens, with the hours and days from your business hours. On desktop you see it by week, on a phone by day. You change the panel's language with RO | EN, at the top.
How to find out when a new appointment comes in
Do this once, at the start.
- In the calendar, click Menu, then Email Notifications.
- Turn on Notifications to me and type your address under My address. If you leave it empty, the messages go to the panel's administrator accounts.
- Turn on Confirmations to clients, so the client gets an email when you confirm or cancel their appointment.
- Click Save.
- Click Send Me a Test Email and check that it arrived.
What happens when a client books on your website
- If appointments confirm themselves, the client sees on the website that their appointment is confirmed.
- If you confirm them, the client sees on the website that their request was sent and that you'll get in touch to confirm.
- The appointment appears in the calendar and under New. The client's record is created by itself or linked to an existing one, by phone number or email.
- If you turned on Notifications to me, you also get an email.
How to confirm or decline new appointments
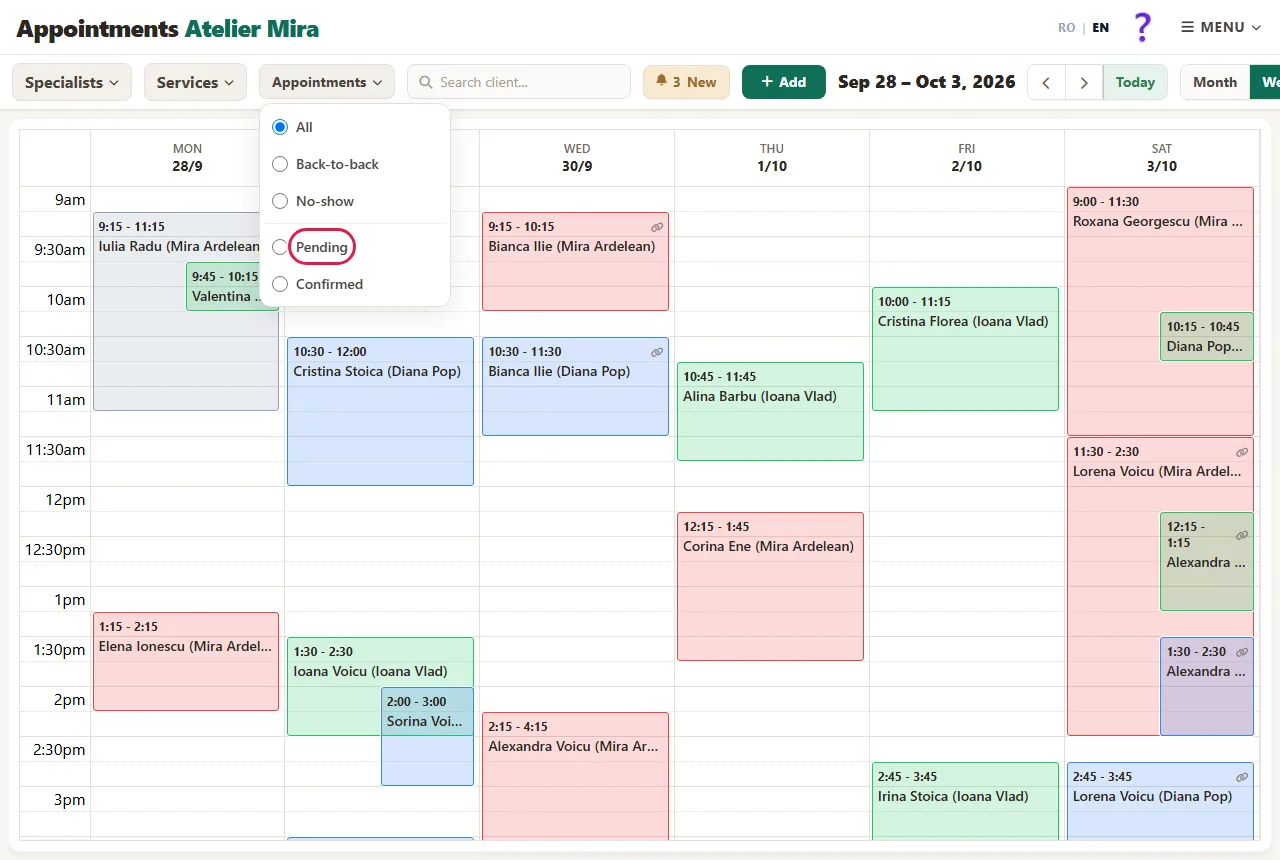
- In the calendar, click New (the bell with a number; on a phone, in the bottom bar). "Needs Your Action" opens, with the appointments you haven't opened yet that came in since yesterday evening (8:00 p.m.), urgent ones first. You'll find older ones in the calendar, with Appointments › Pending.
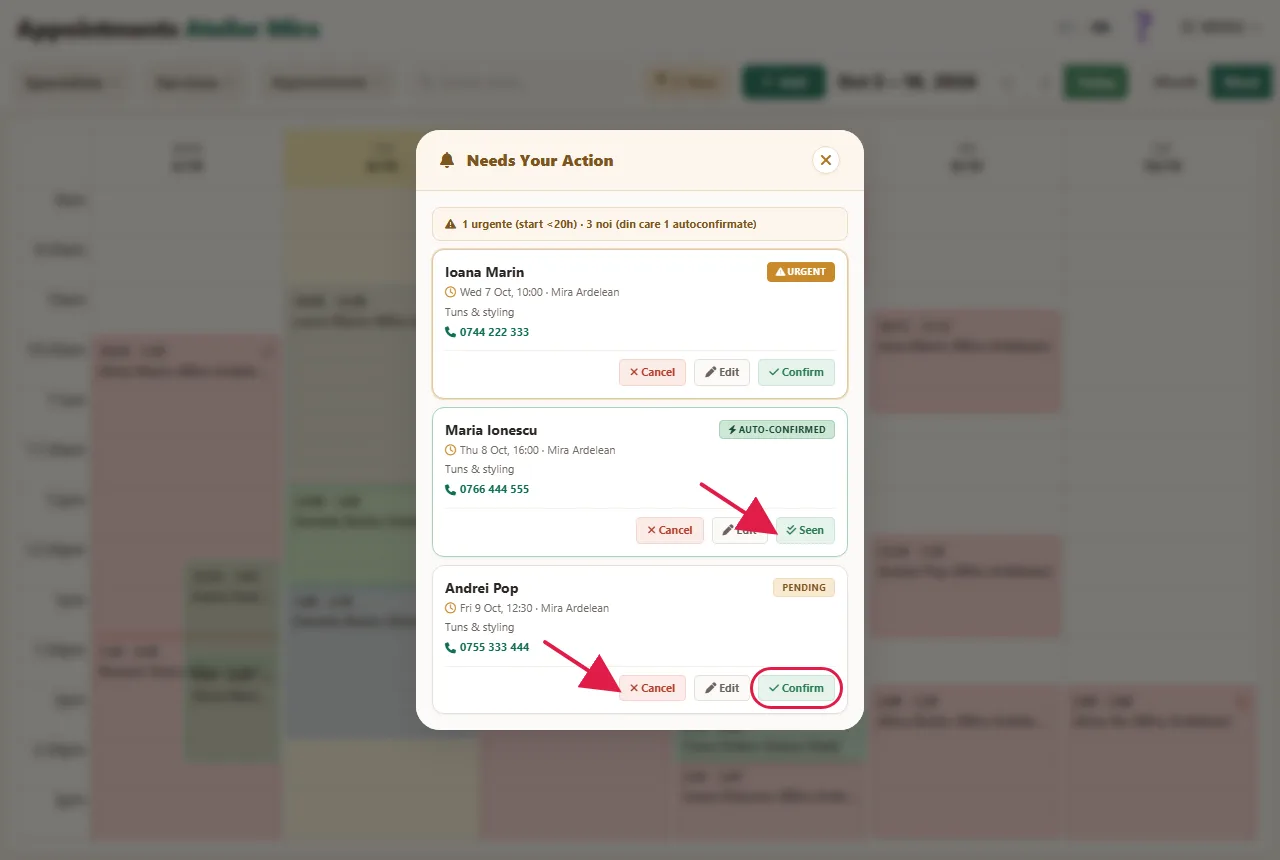
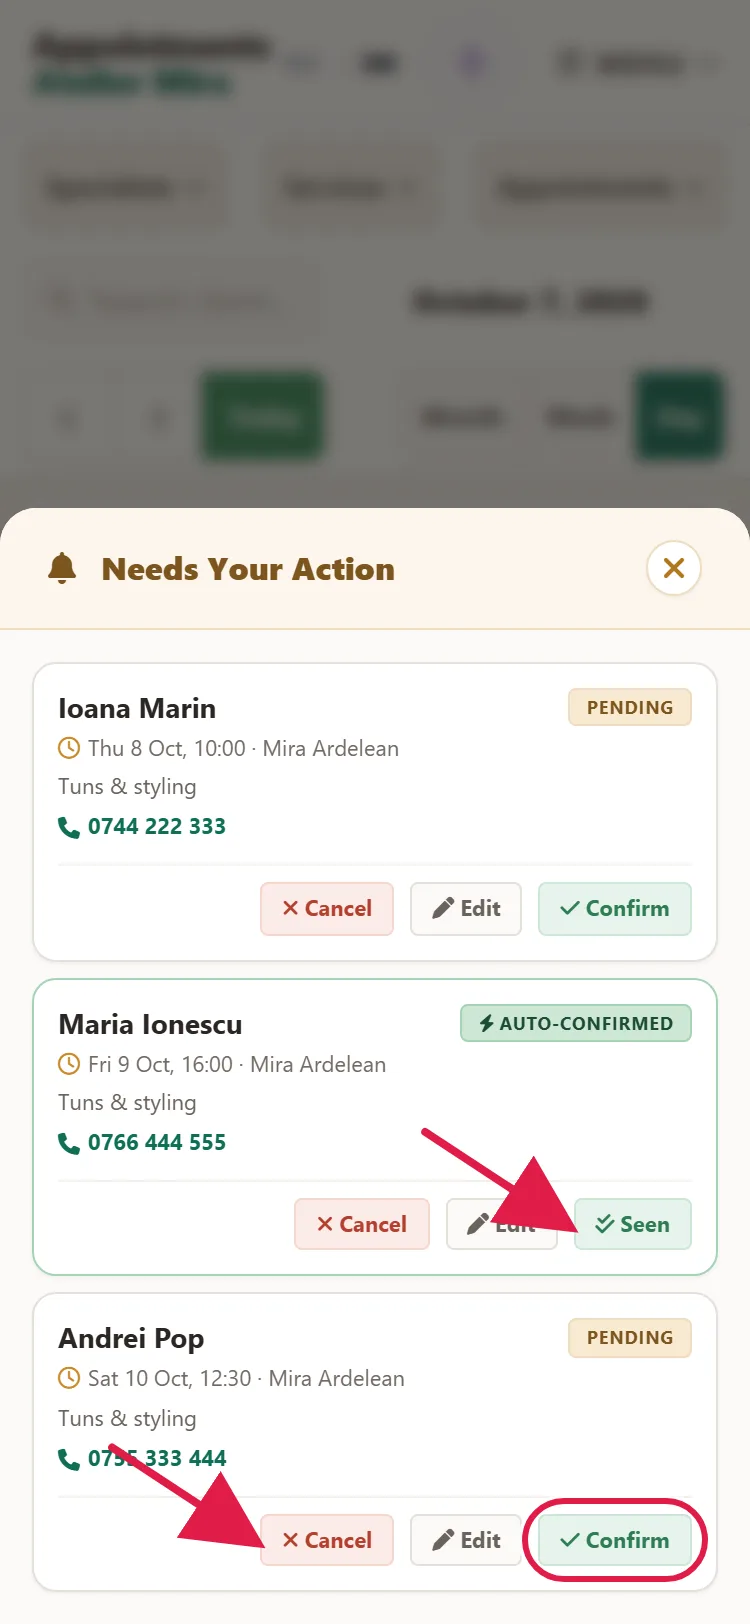
- Look at each appointment's label: Pending (you confirm it), Urgent (it's pending and starts in less than 20 hours) or Auto-confirmed (it confirmed itself).
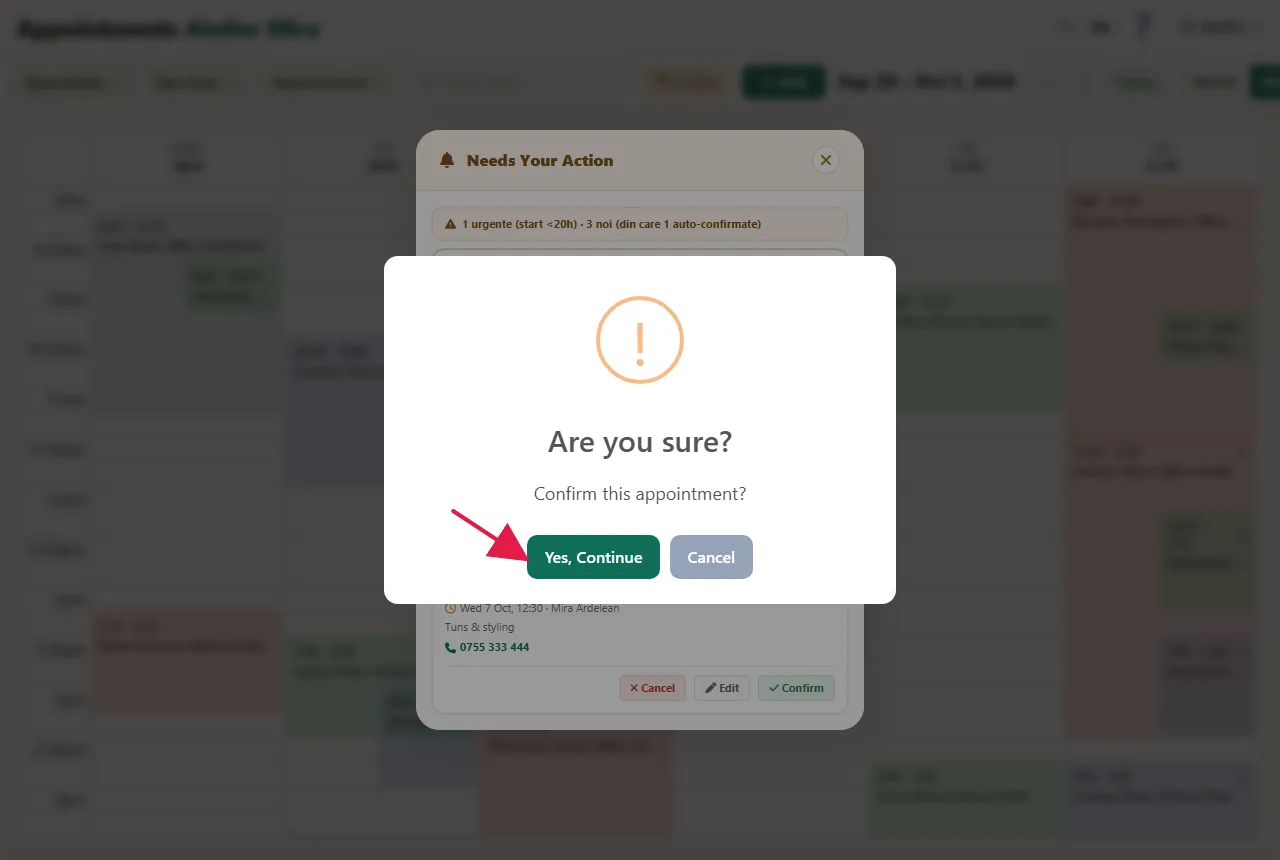
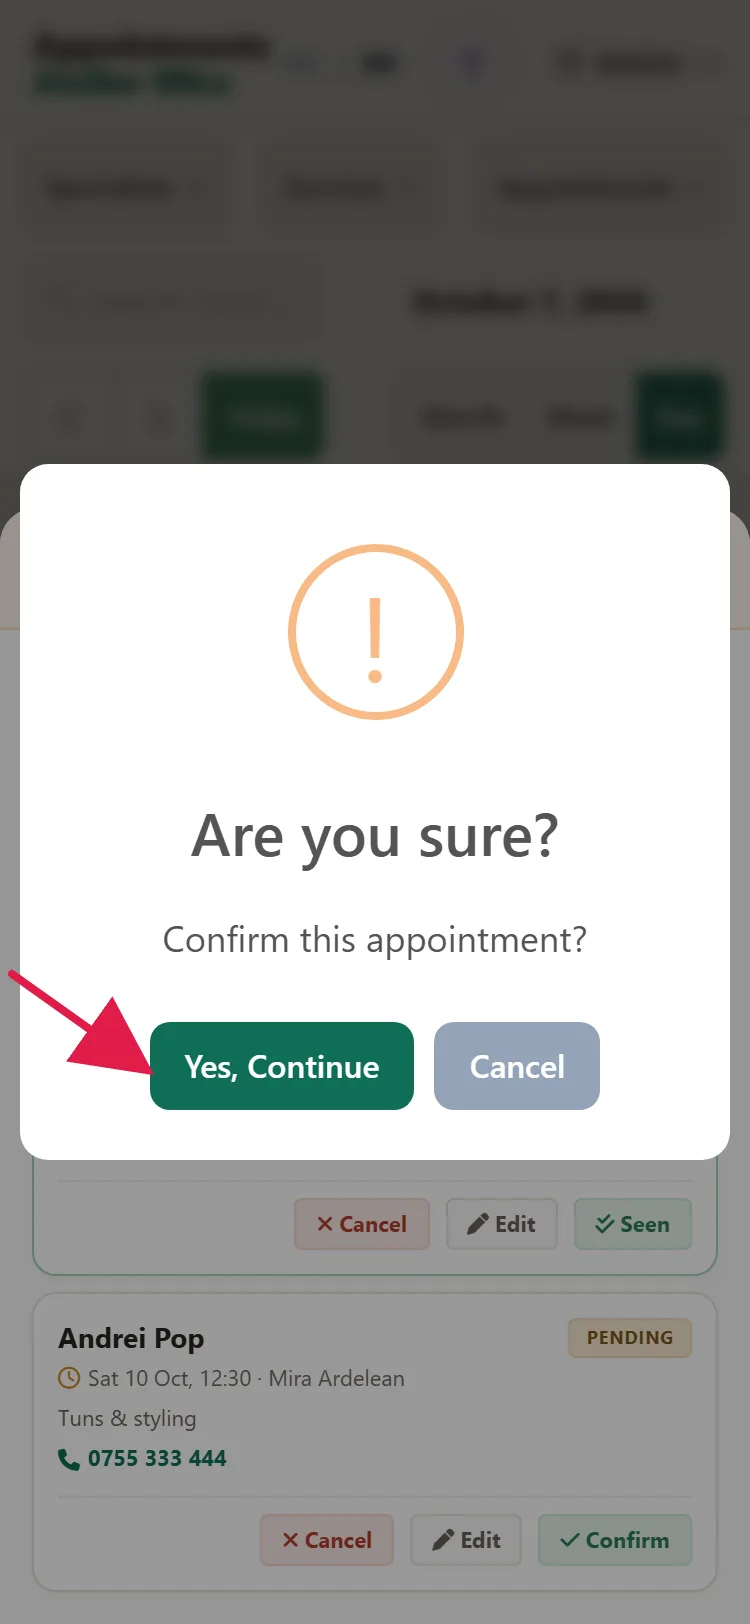
- To confirm, click Confirm, then Yes, Continue. If you turned on "Confirmations to clients" and the client left an email, they get the appointment by email, with a link to confirm they're coming.
- To decline, click Cancel. If you want, write a message under Message for the client (for example "We can see you on Thursday after 2 p.m."), then click Yes, Continue.
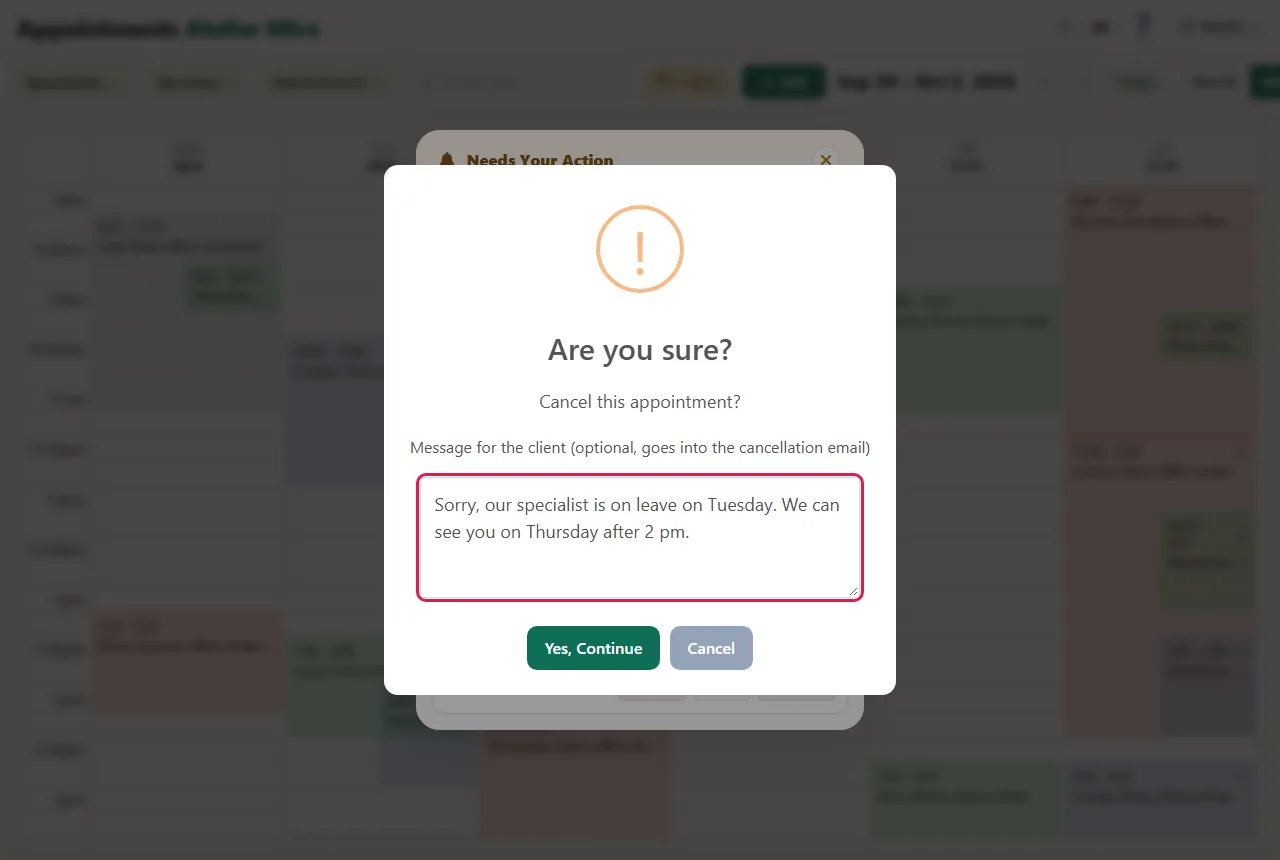
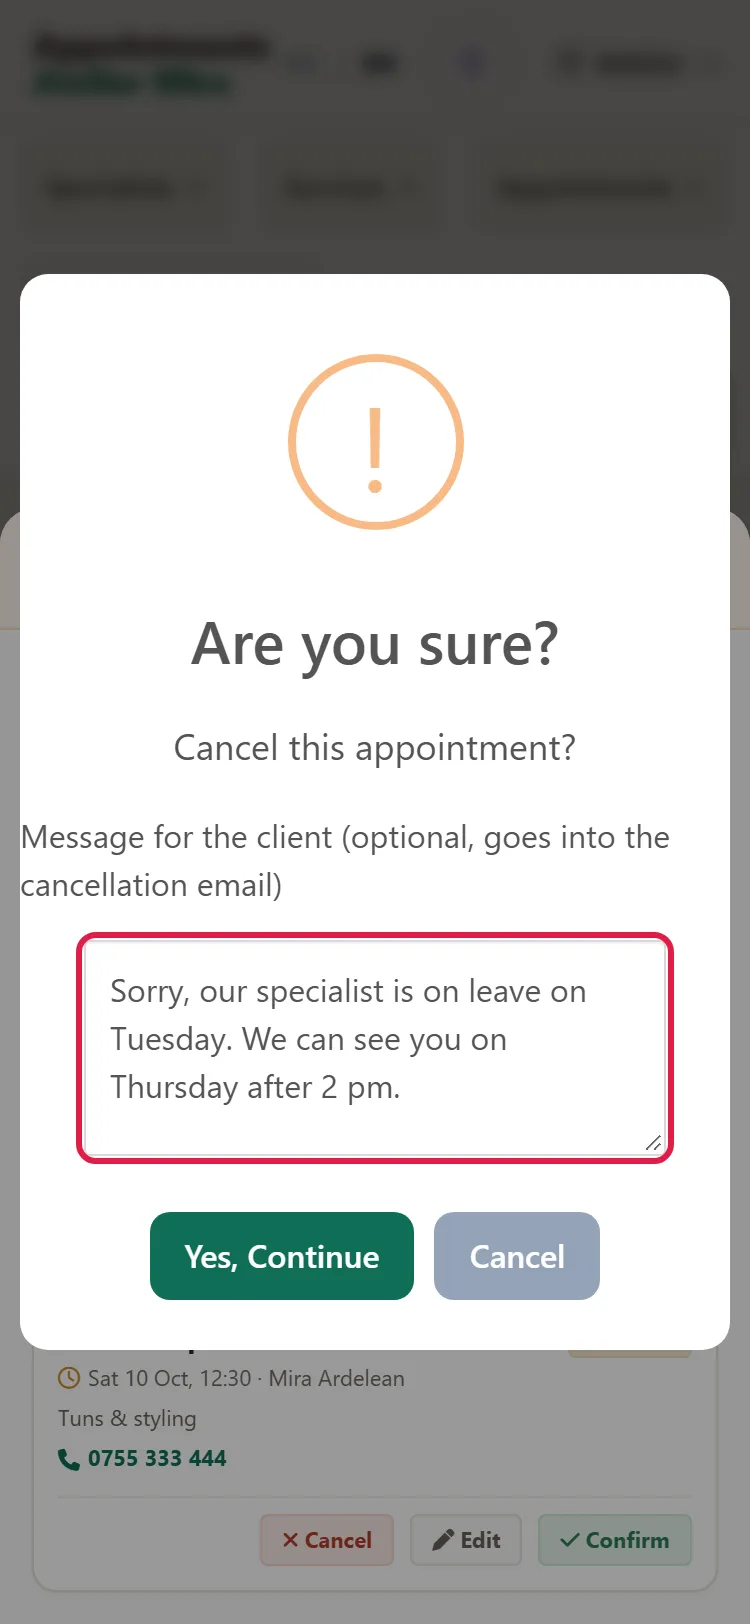
- The declined appointment disappears from the calendar. The client gets an email saying that time can't be kept, with your message and a link to the website, so they can choose another time.
- For an Auto-confirmed appointment, click Seen. It's already confirmed; you're only taking it off the list.
You use the same button, Cancel, when you cancel an appointment you confirmed earlier.
How to add an appointment you got by phone
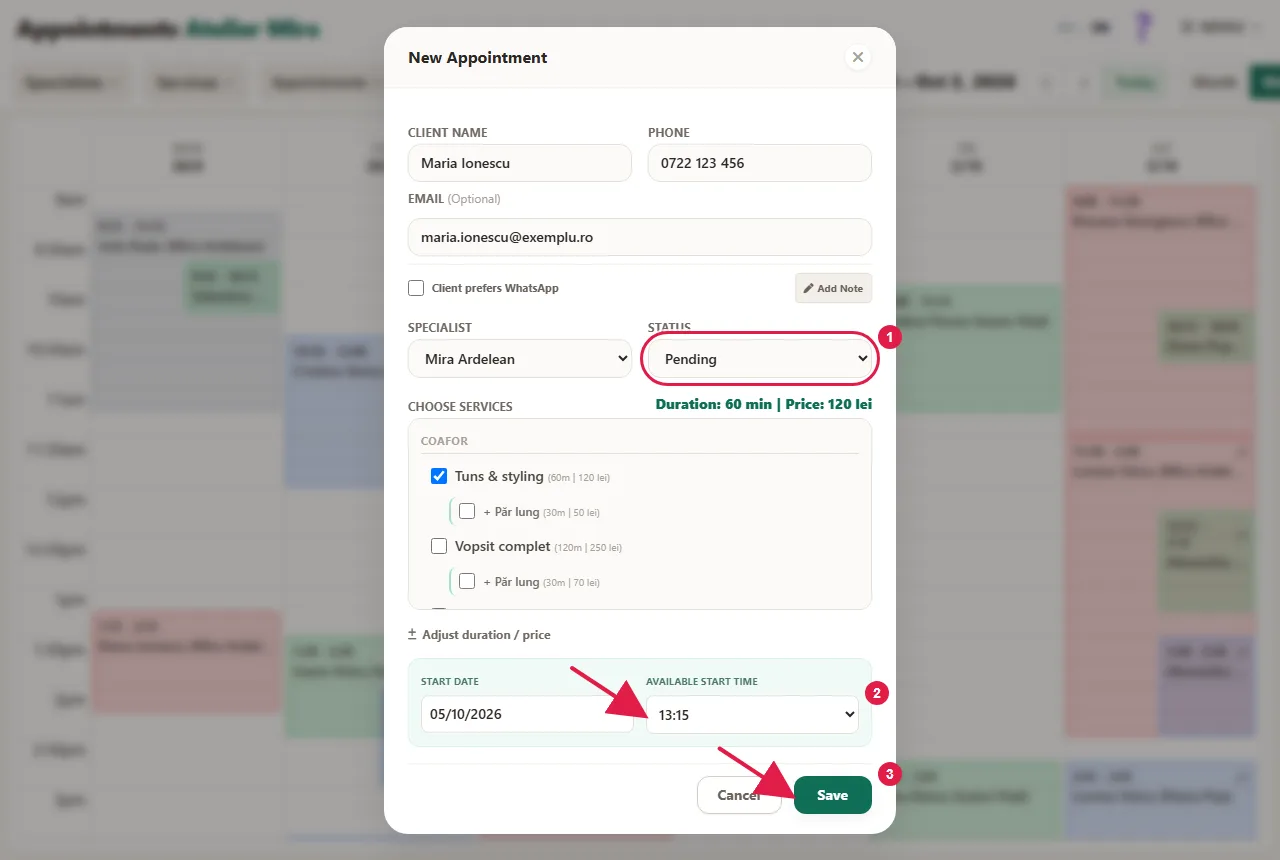
- In the calendar, click Add (or click a free time in the Week or Day view). "New Appointment" opens.
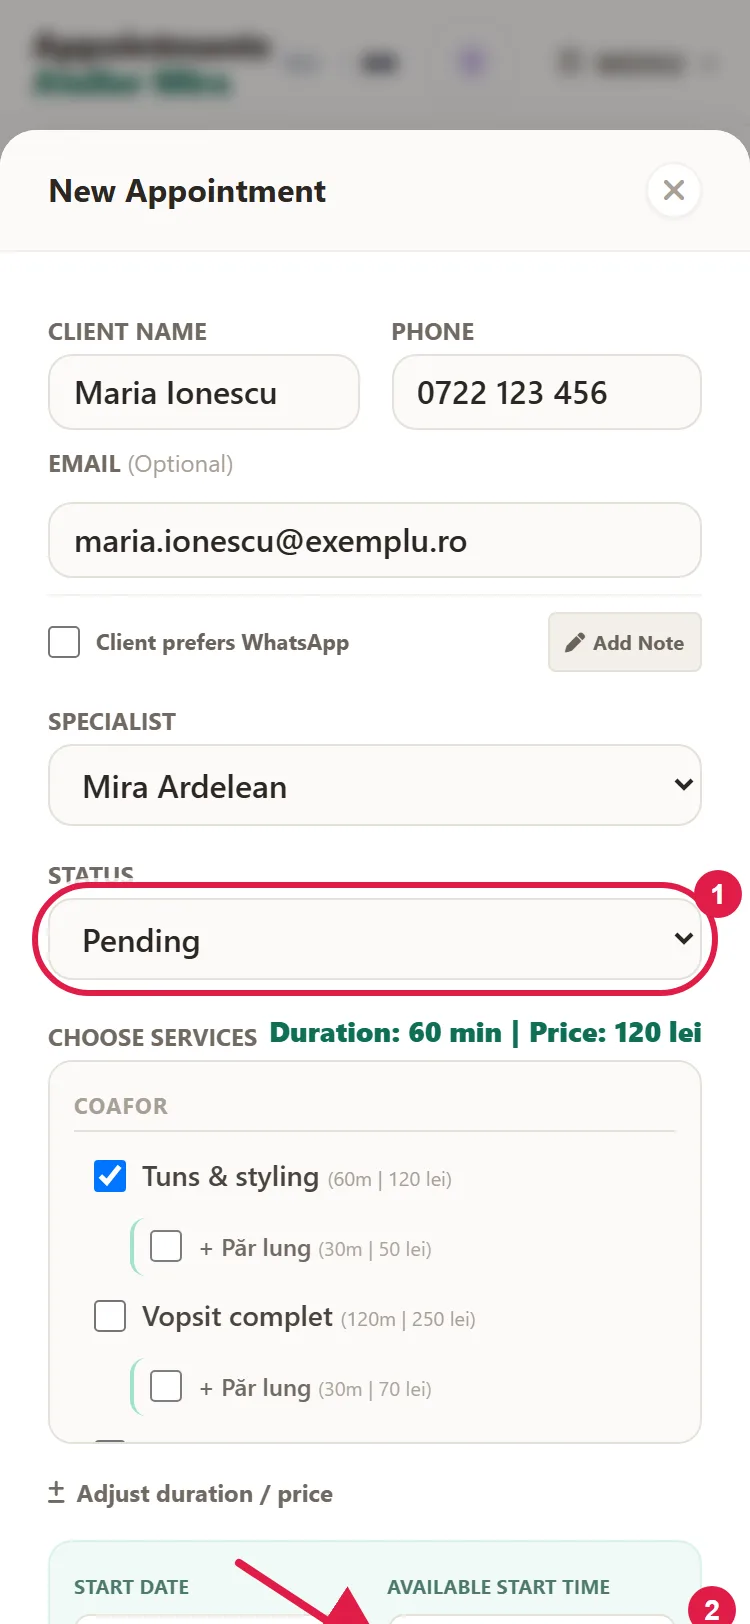
- Type Client Name and Phone. The email is optional. Check Client prefers WhatsApp, if that's the case.
- Choose the specialist and check the services. Next to each service you see its duration and price.
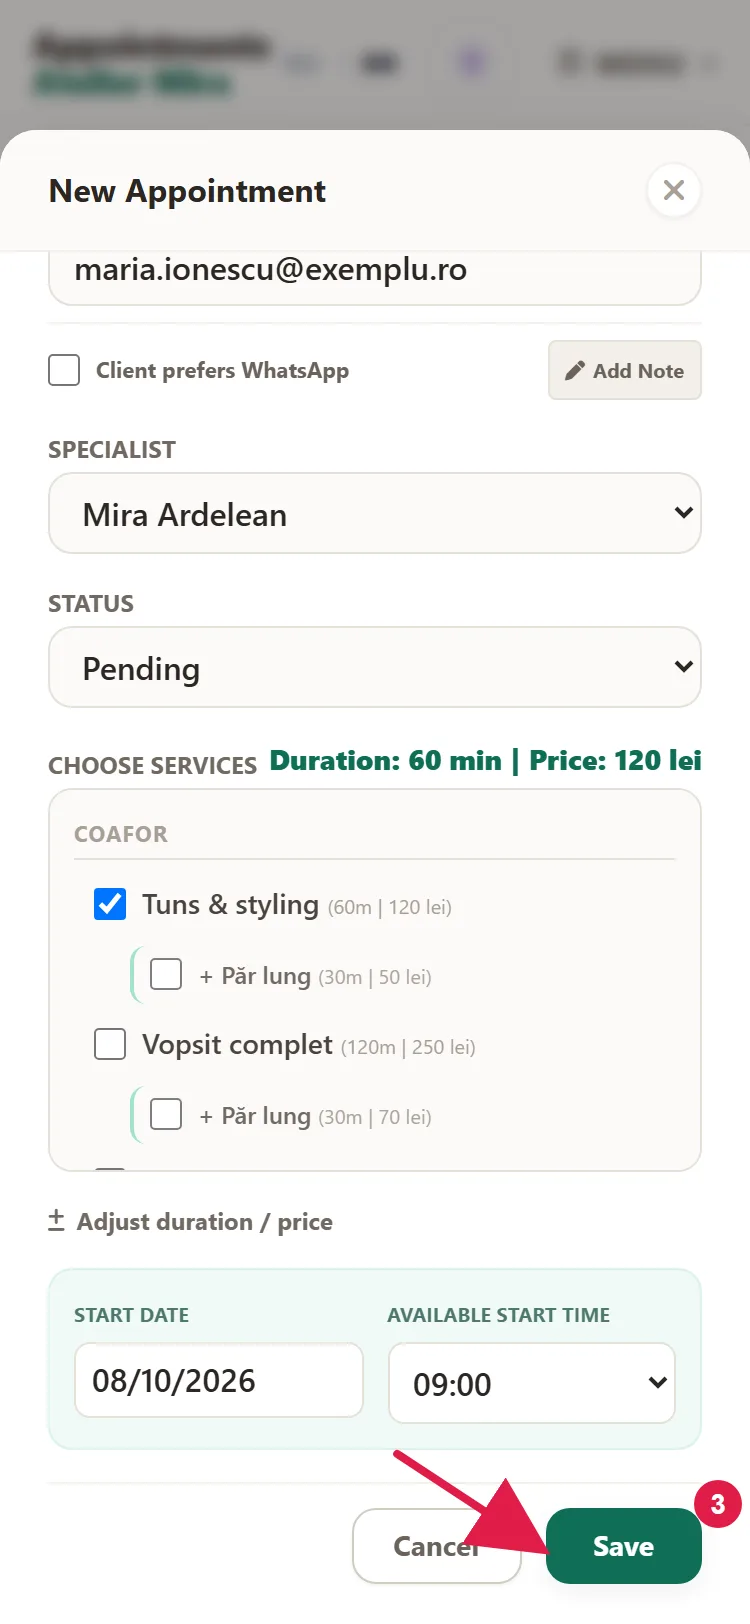
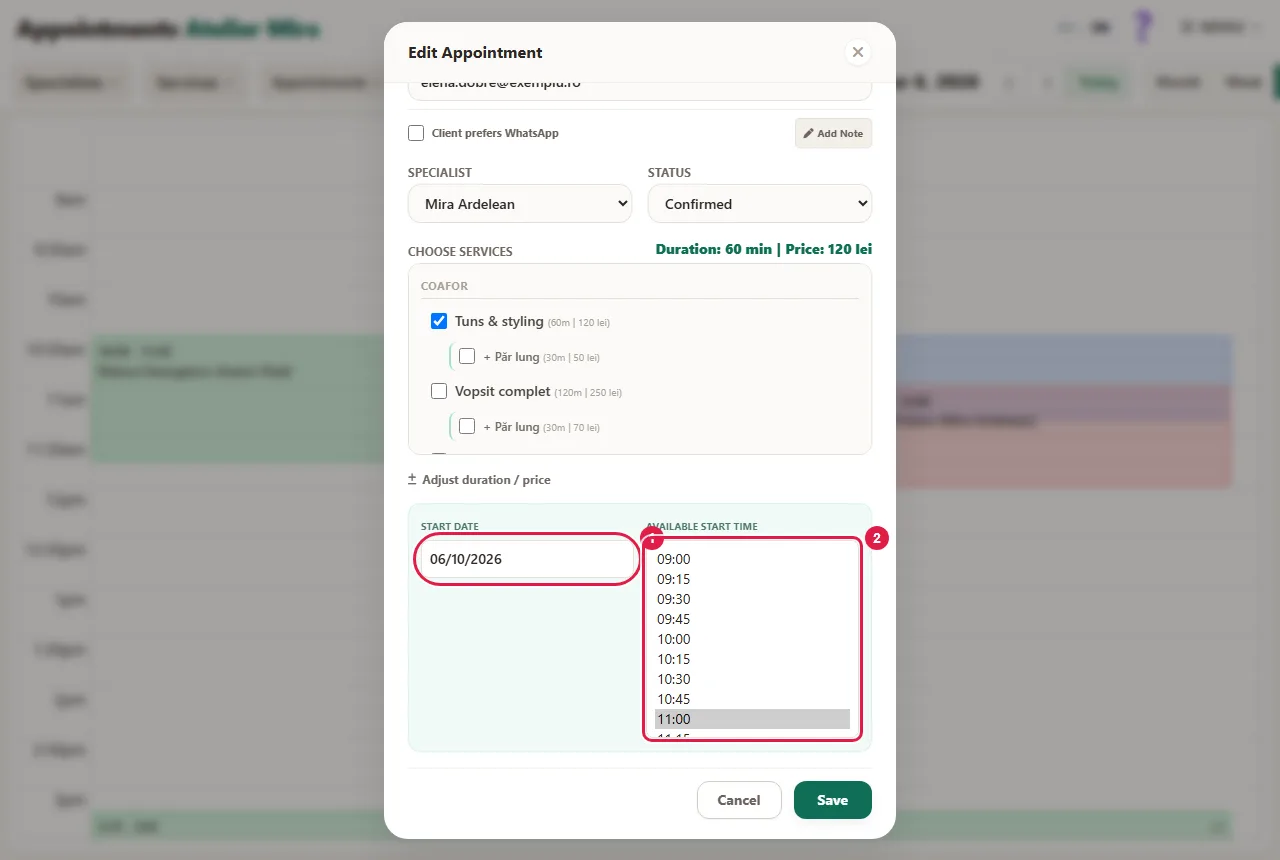
- Choose the day under Start Date, then the time under Available Start Time. The list shows only free times, every 15 minutes.
- Under Status, leave Pending or choose Confirmed.
- Click Save. The appointment appears in the calendar.
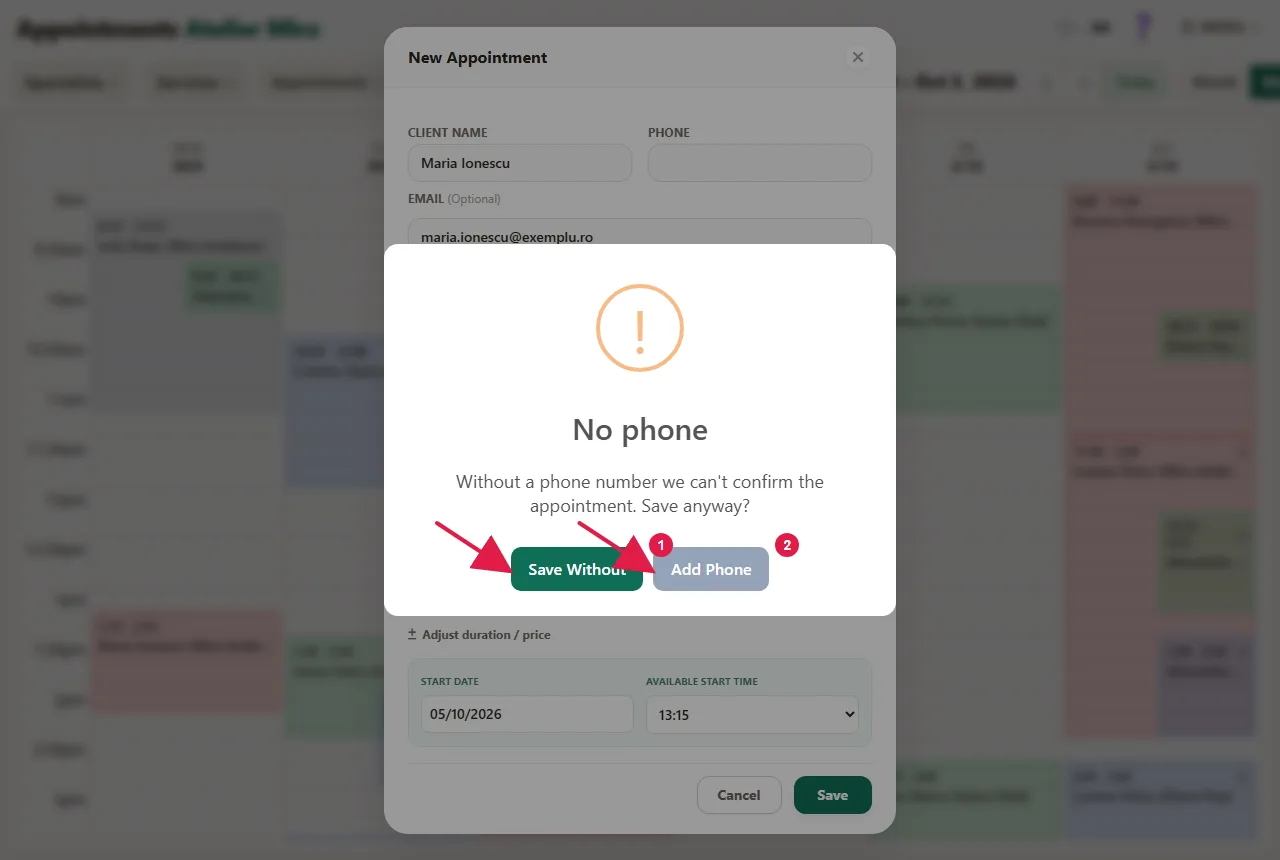
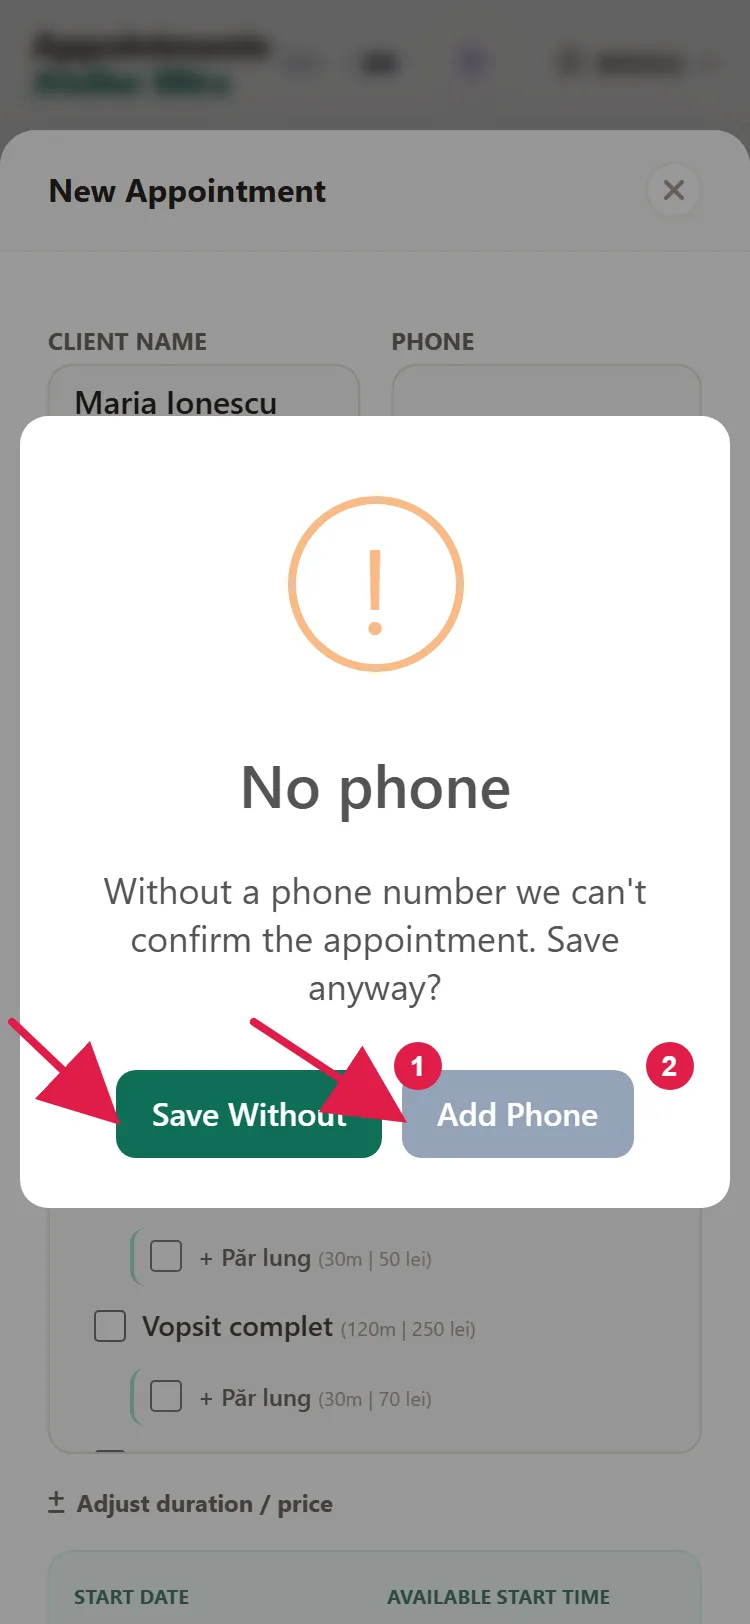
If you didn't type a phone number, the panel asks you: click Add Phone or Save Without. Without a phone number, you can't call the client and no SMS messages go out; if they have an email address, the confirmation email goes out as usual.
If Heads up! appears, read what it says and choose Yes, Save or No, Edit.
How to move an appointment
- In the calendar, click the appointment. The window with the client and their appointment opens.
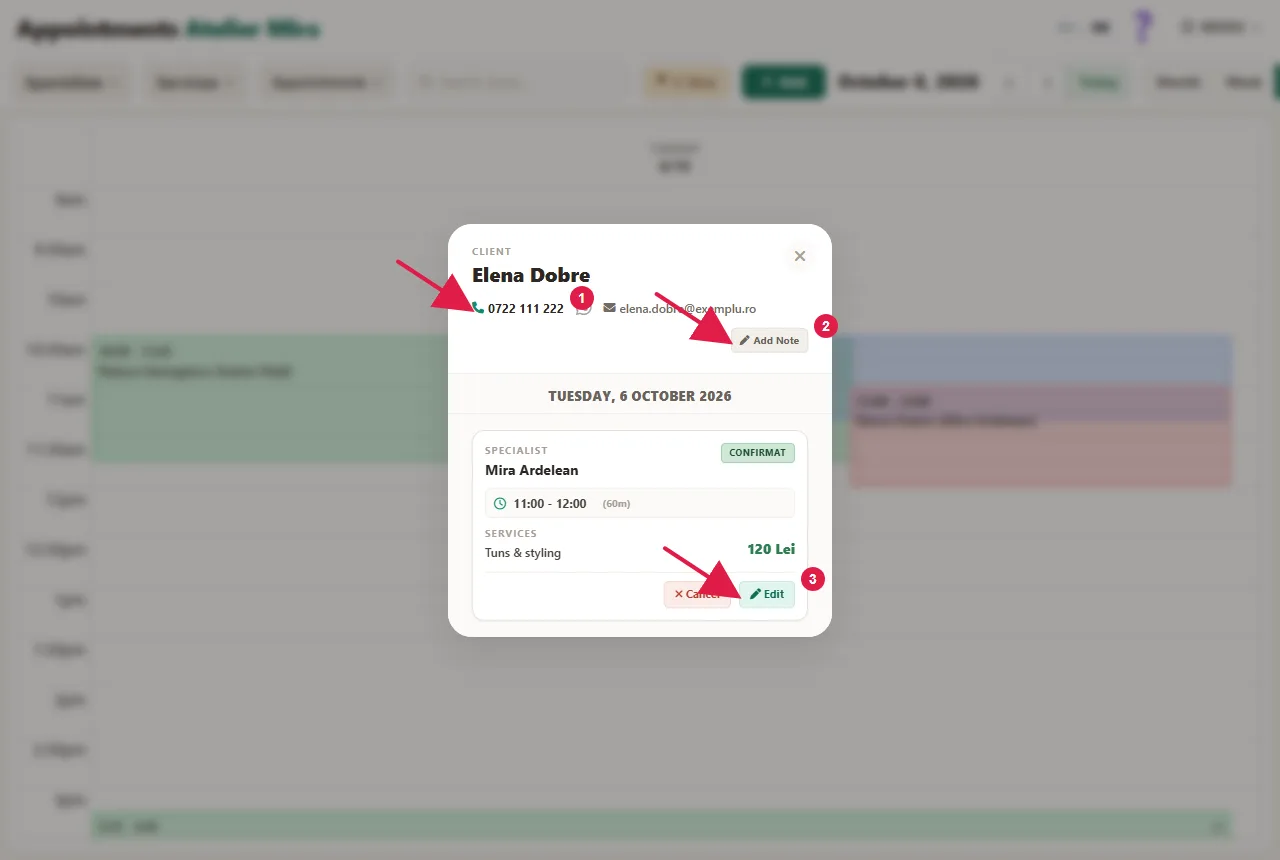
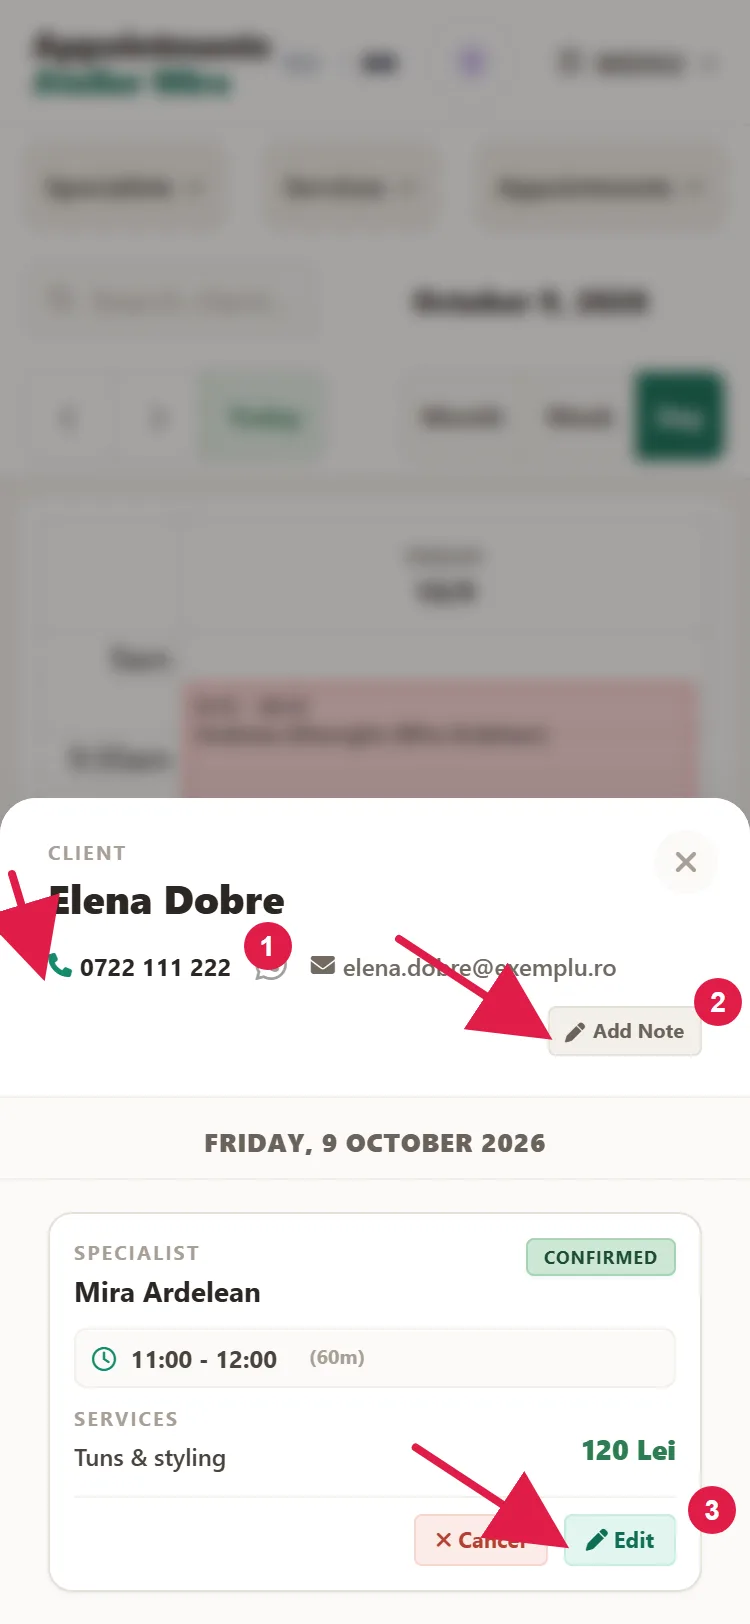
- Click Edit.
- Change the day under Start Date and, if needed, the specialist.
- Choose the new time under Available Start Time. The old time appears in the list as "(Original time)".
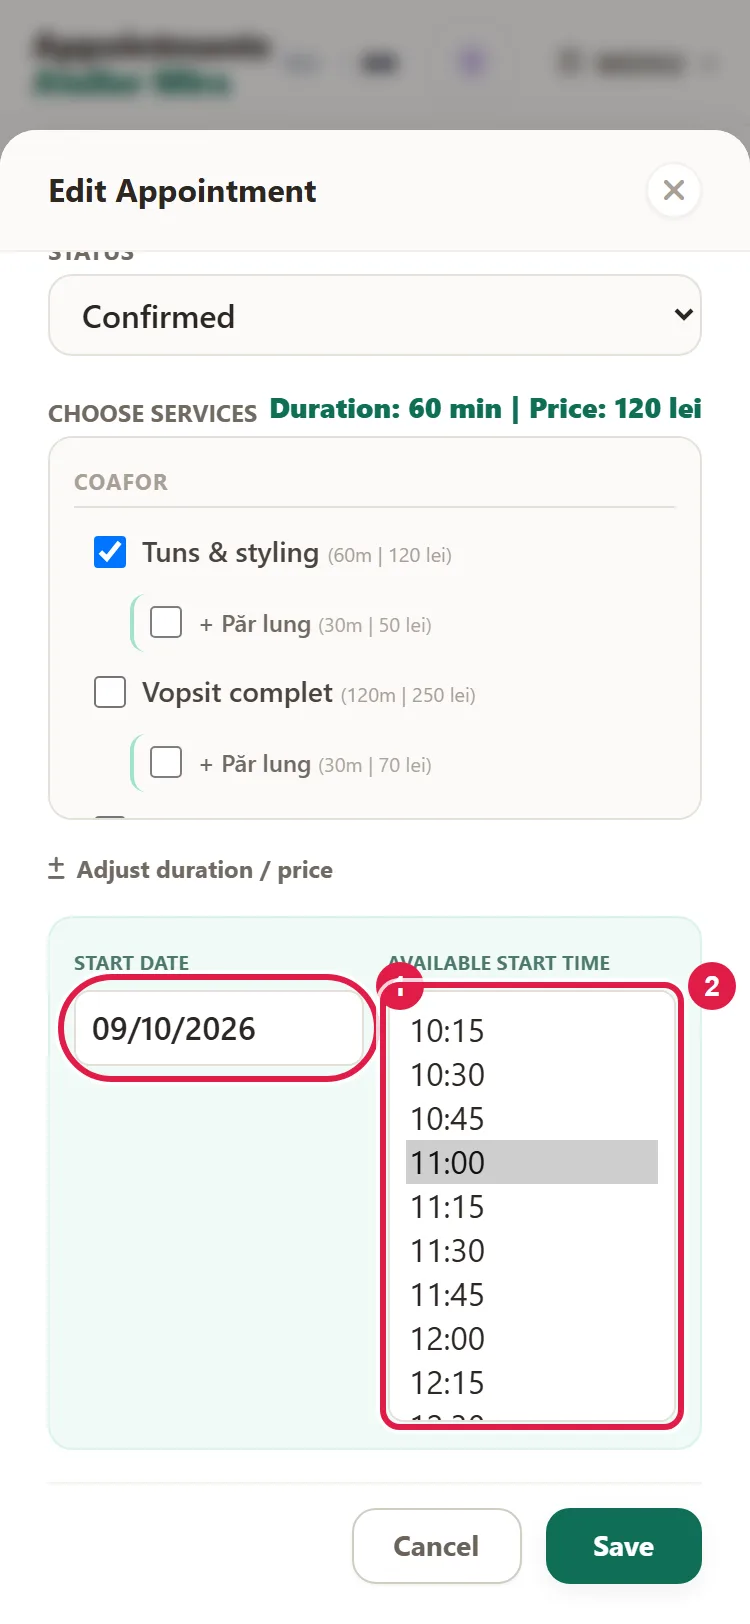
- After you change the day or time, the Let the client know the appointment has moved box appears. Check Email. The SMS checkbox also reaches clients who don't read their email; it only works if you have SMS messaging and the client's phone number on their record; next to it you see how many SMS messages you have left this month.
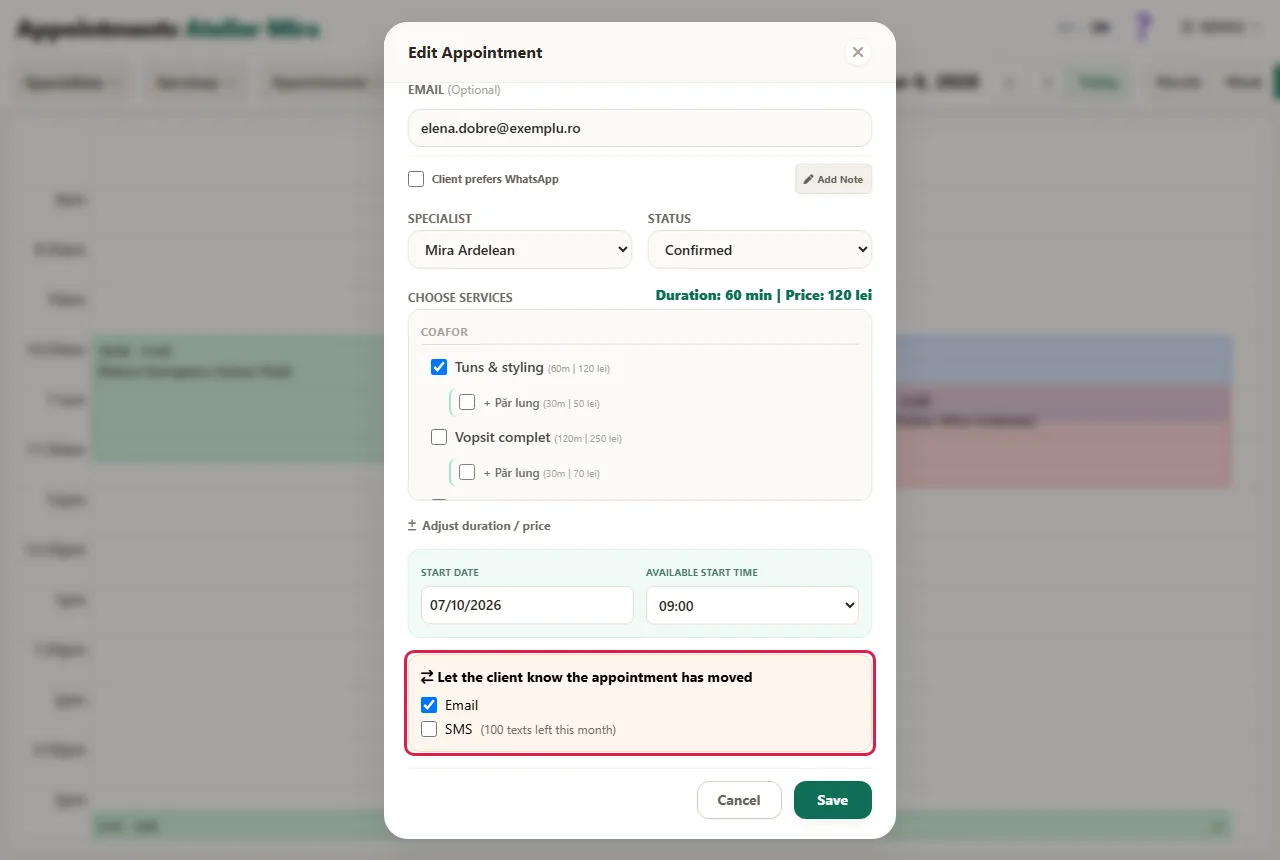
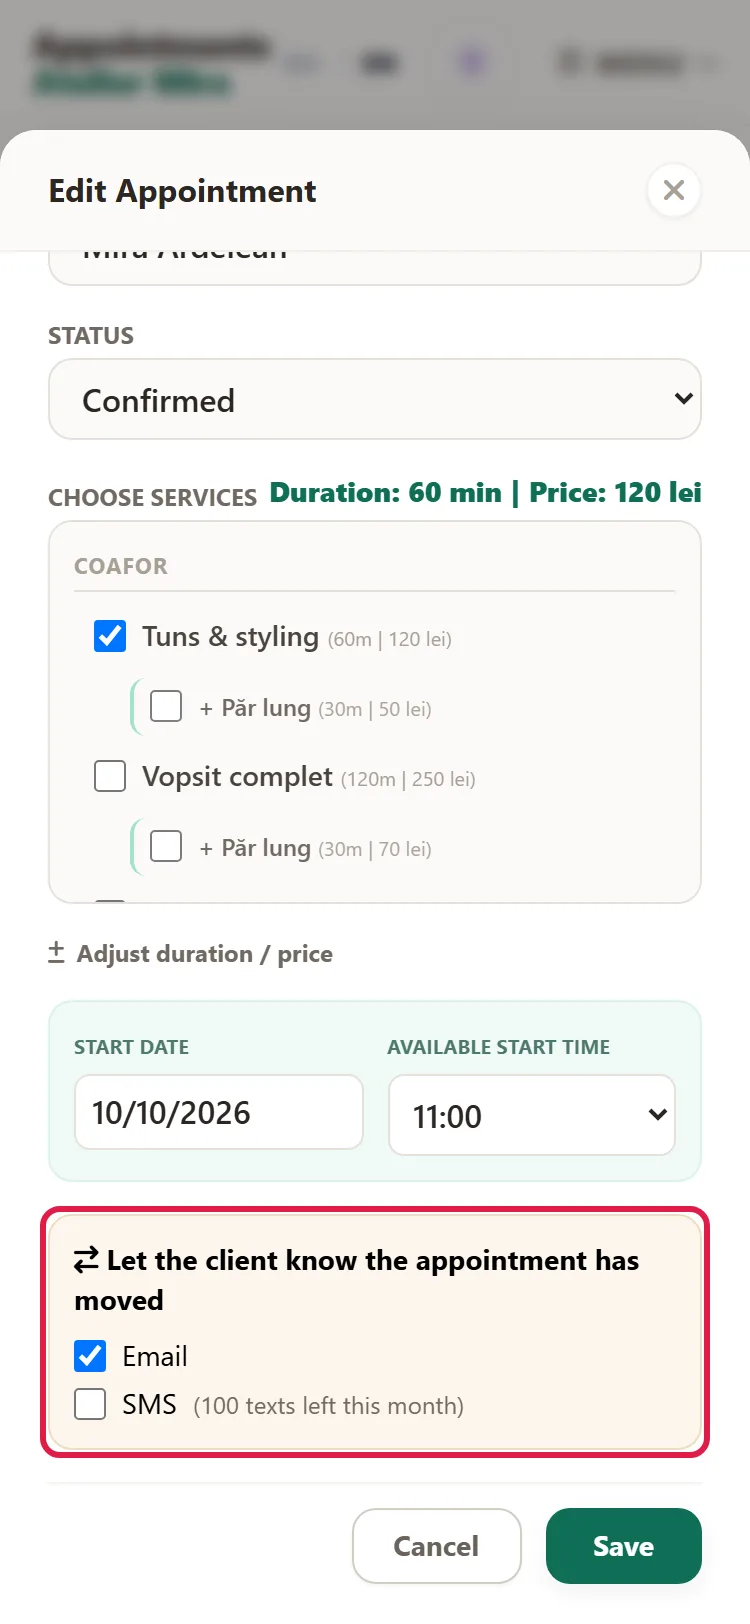
- Click Save. The appointment appears at the new time, and the client gets "Your appointment has been moved", with the new time and the old one, and confirms again from the link.
Also from Edit, you change the status (Confirmed, Pending, No-show, Canceled) and adjust the duration or price, under Adjust duration / price, with a reason.
If you run a restaurant: how to work with your tables
At a restaurant, the calendar opens on Tables: one row for each table, across the hours of the day. Click a free spot to add a booking for that table and time. In the window, you choose how many people are coming, not a dish from the menu.
If you run a guesthouse: how to add a stay and how to close a room
At a guesthouse, the calendar opens on Rooms: one row for each room, over 14 days, with the bookings as bars. The bottom row, Available, shows how many rooms are still free each day. Click a bar to see the booking; click a free day in a room's row to add a booking for that room and day.
Instead of the time and services, you choose the check-in and check-out, and the window shows you the nights and the price, for example "3 nights · 840 lei". The check-out day stays free for the next guest. You change a booking that came from the website the same way.
The website and booking platforms don't sync on their own. When you get a booking on a platform or you're renovating, close the room for that period:
- Click Add and, in the window, Close Room.
- Choose the room, Check-in and Check-out. Under Reason, you can write why it's closed, if you want, for example "Booking.com reservation".
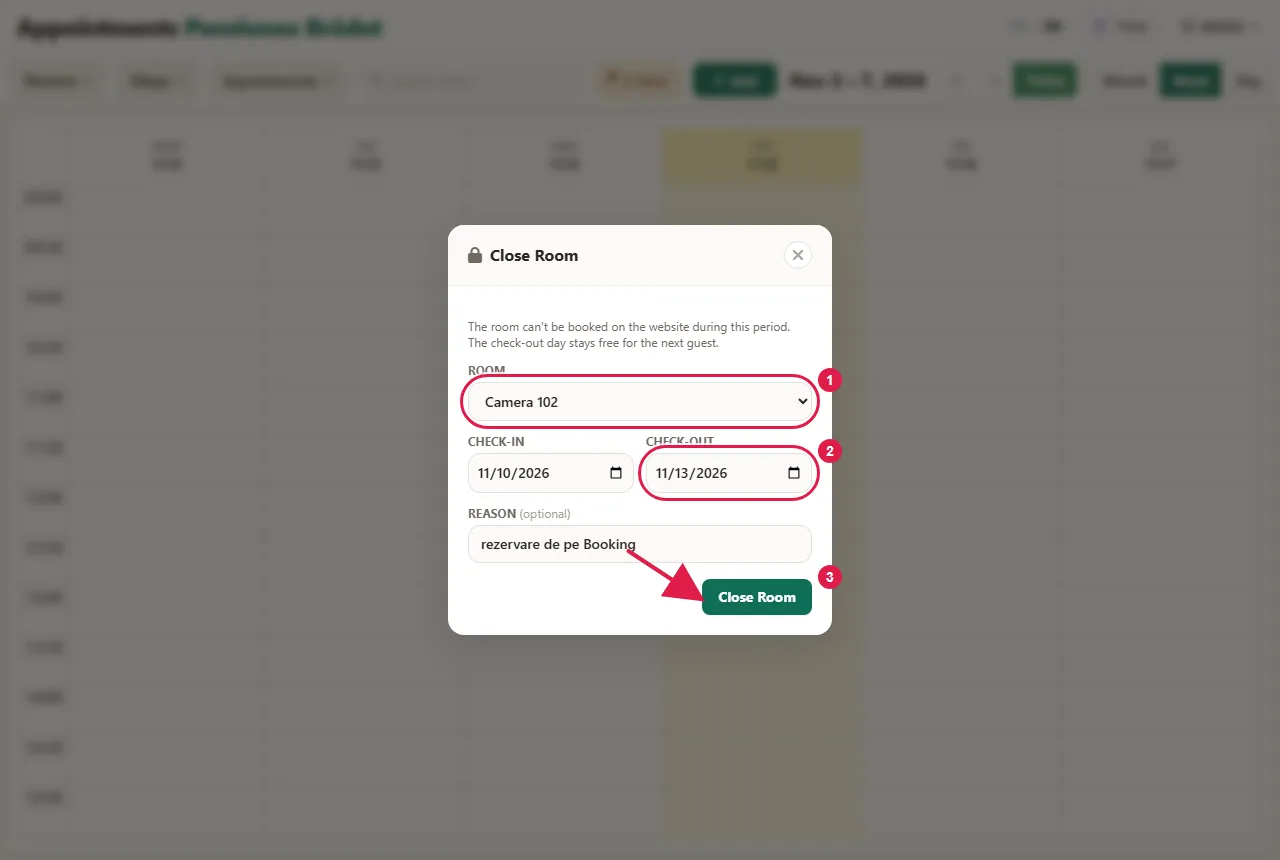
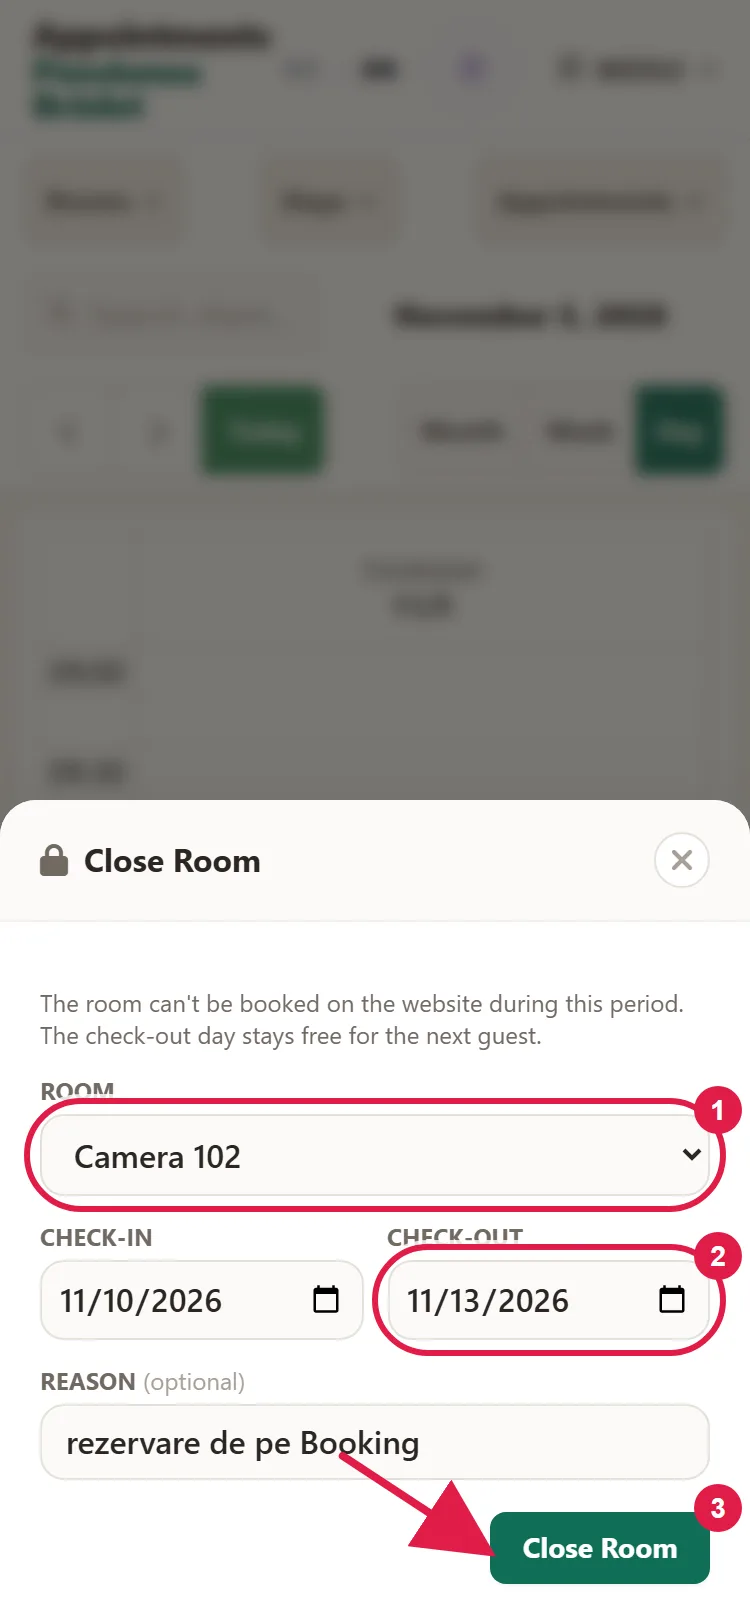
- Click Close Room. The room can't be booked on the website during that period, and a striped bar appears in Rooms, with your reason or, if you didn't write one, Closed. It doesn't go into reports, payments or messages.
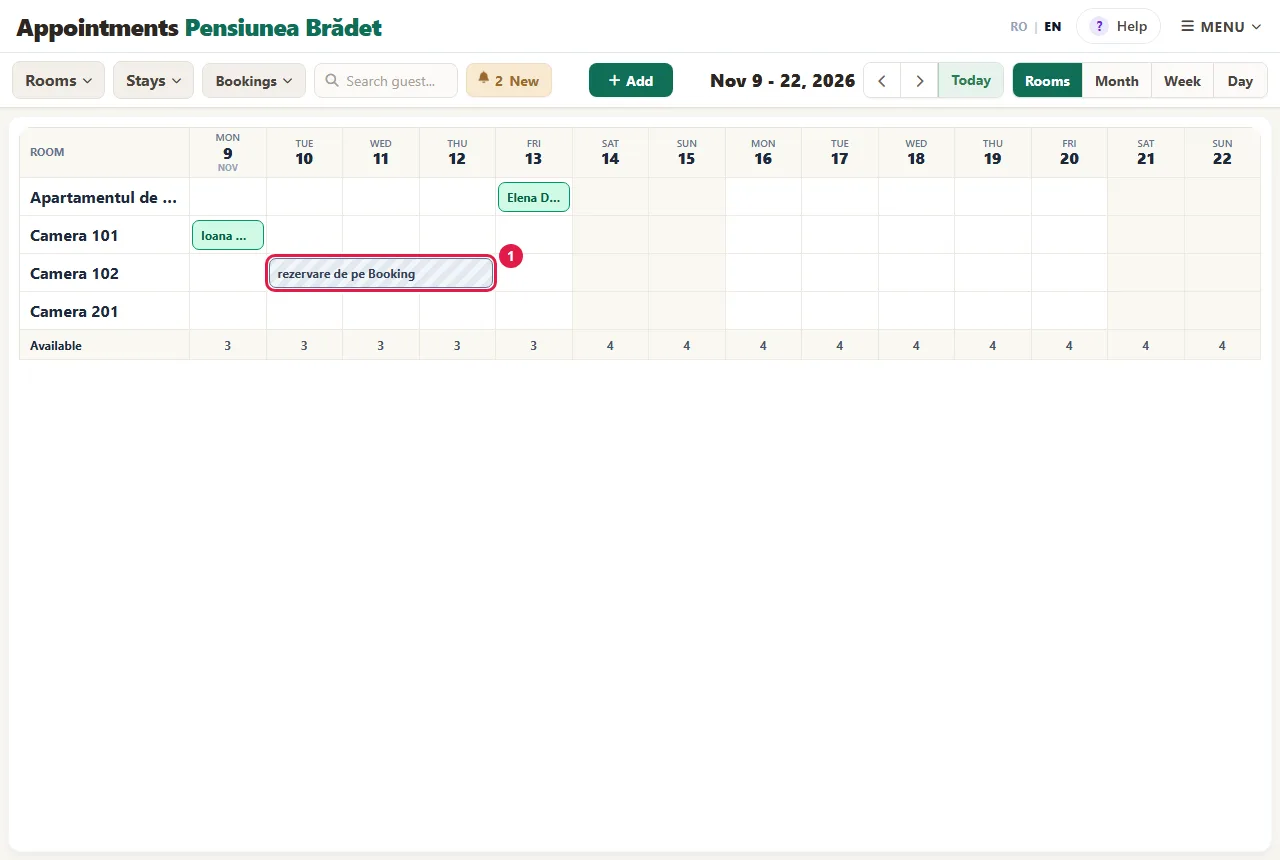
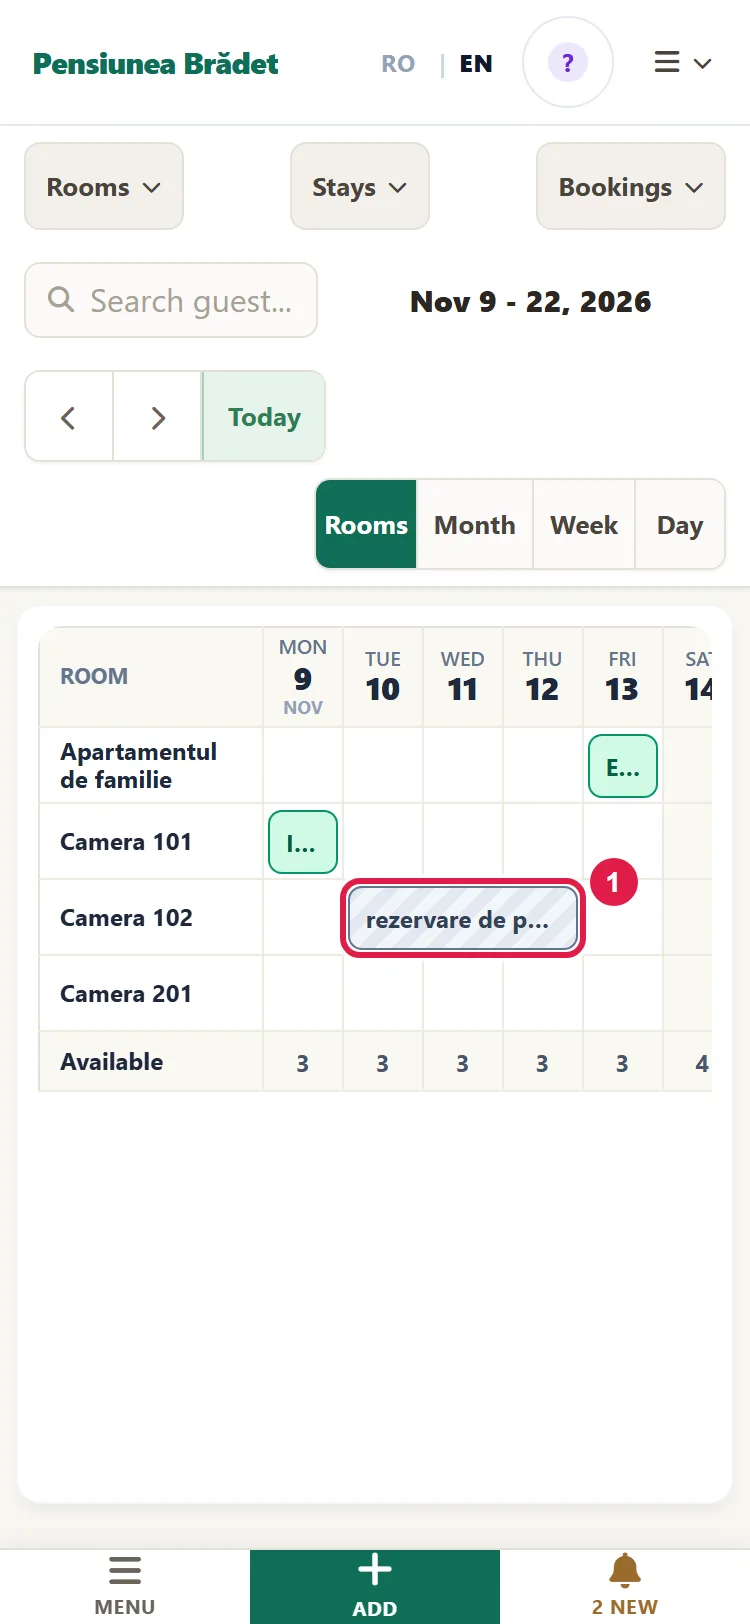
- To reopen it, click the bar, then Reopen Room.
The other way around, when you get a booking on the website, you close it yourself on the platform. On the website, a booking is for a single room.
How to quickly find an appointment and make a note about a client
- Browse the calendar with the arrows and Today. Choose the view: Month, Week or Day; at a guesthouse, you also have Rooms, and at a restaurant, Tables.
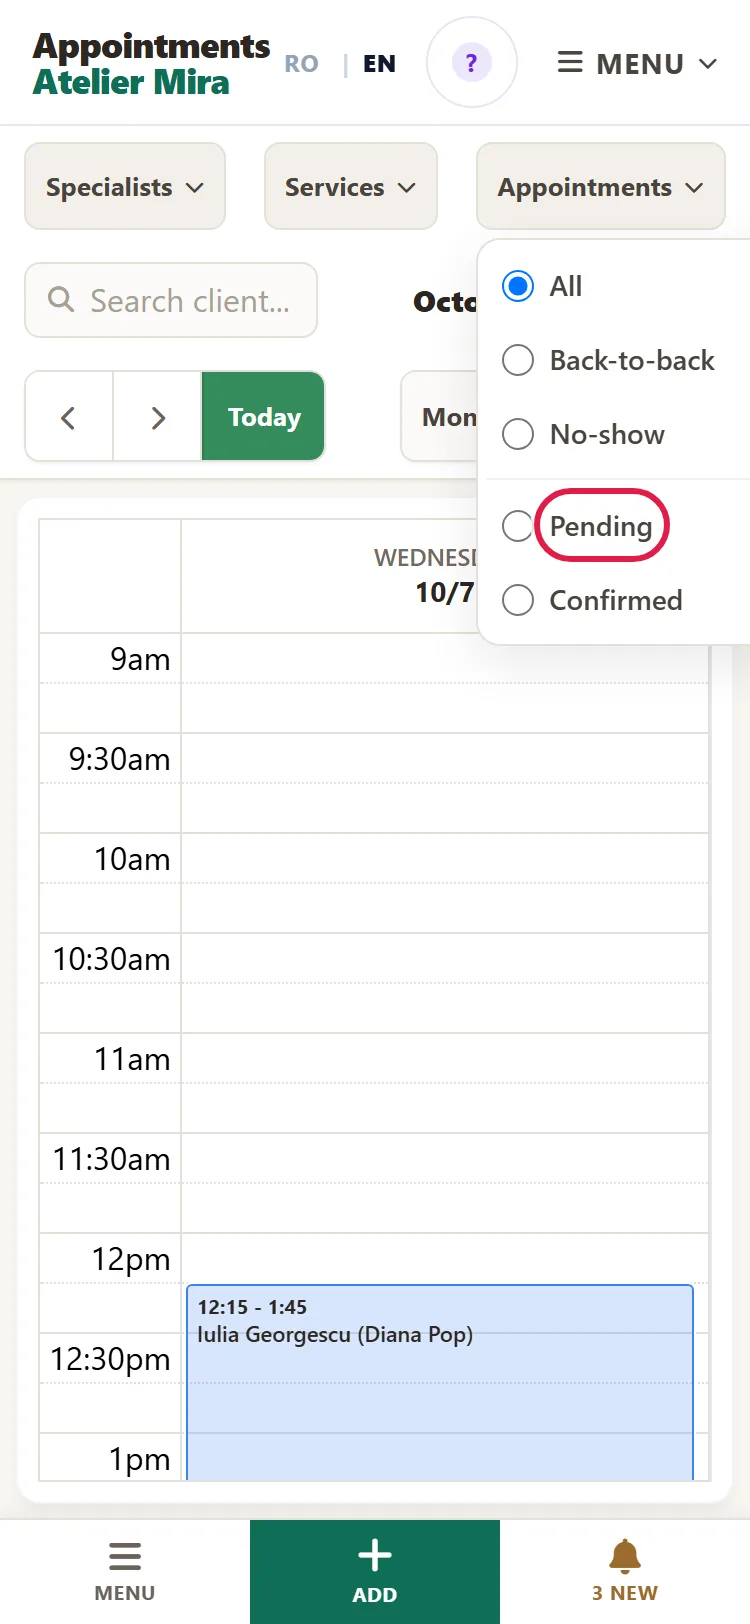
- From Specialists, Services and Appointments you choose what you see. For example, Appointments › Pending shows only what you still have to confirm.
- Type the name in Search client... and choose them from the list: the calendar shows only their appointments. To see the whole calendar again, empty the field.
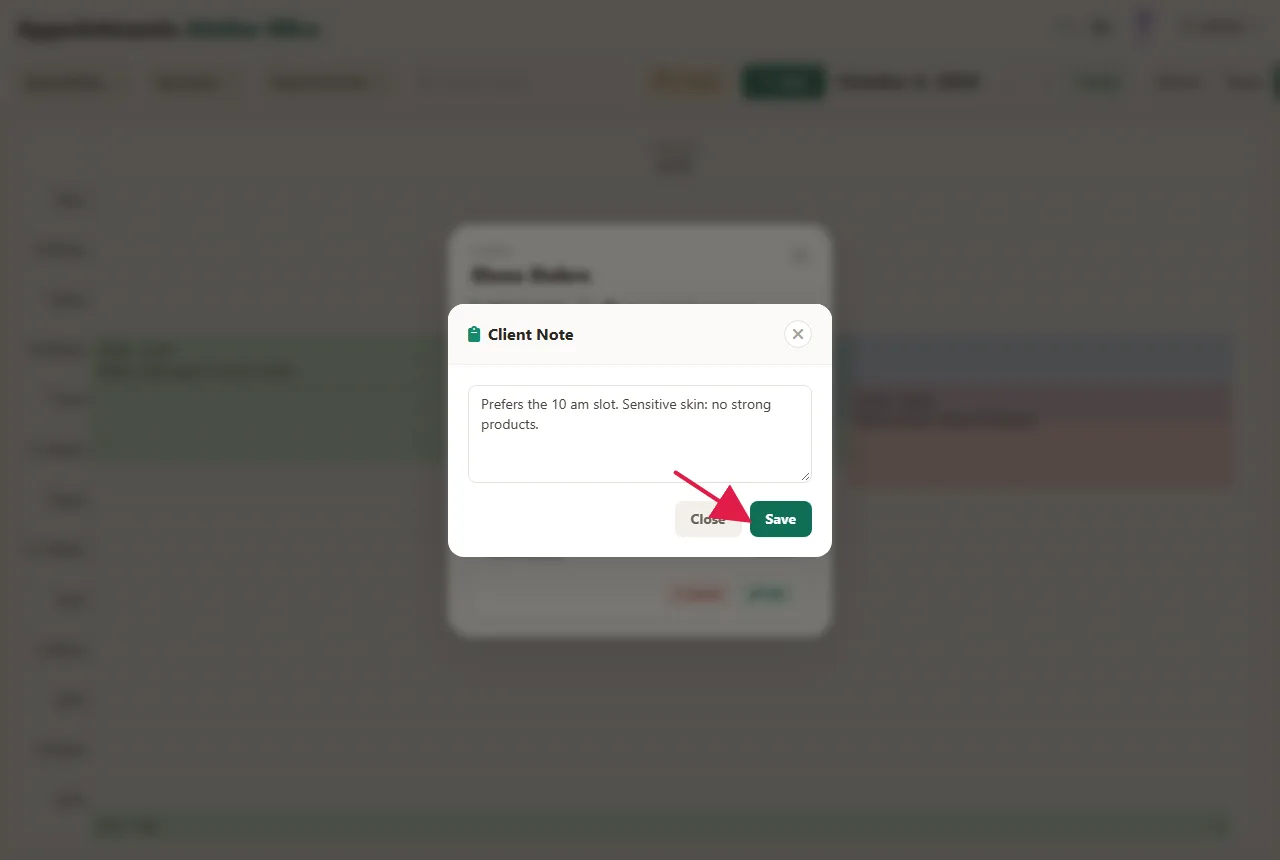
- To make a note about a client (an allergy, a preference), open the appointment and click Note. Write it and click Save. The note stays on the client's record and you see it on all their appointments.
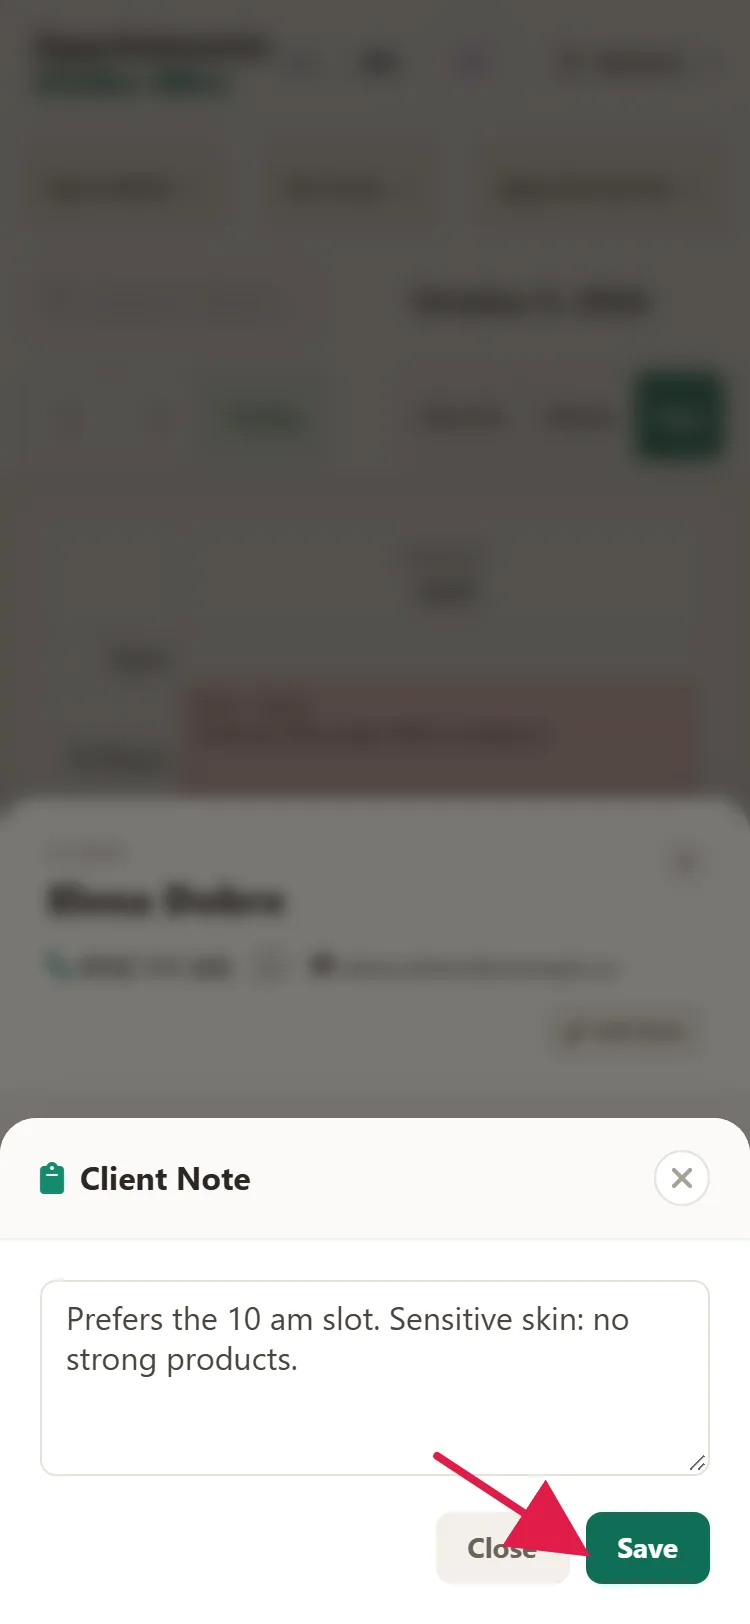
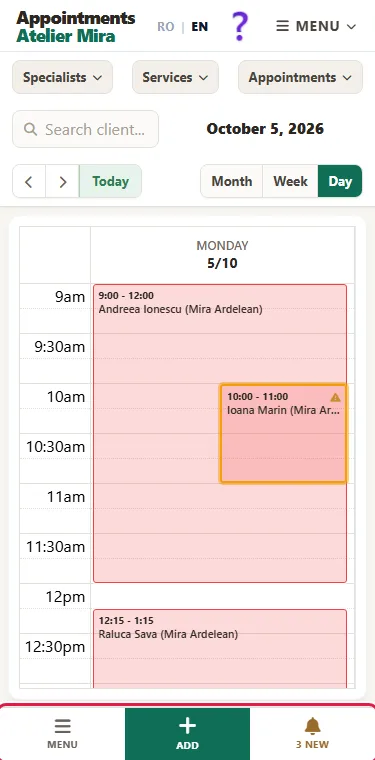
On a phone, the bottom bar has Menu, Add and New: they open the same windows as on desktop.
How to work with quote requests (only if you have "Requests")
Some businesses (for example, a plumber or an auto repair shop) get requests on their website with no fixed time. You find them under Menu › Requests (the name may differ, depending on the trade).
- Open Requests and choose what you see: New, Contacted, Scheduled, Completed, Declined.
- After you talk to the client, click Contacted.
- To give them a time, click Book. "New Appointment" opens, with the name, phone number and address already filled in.
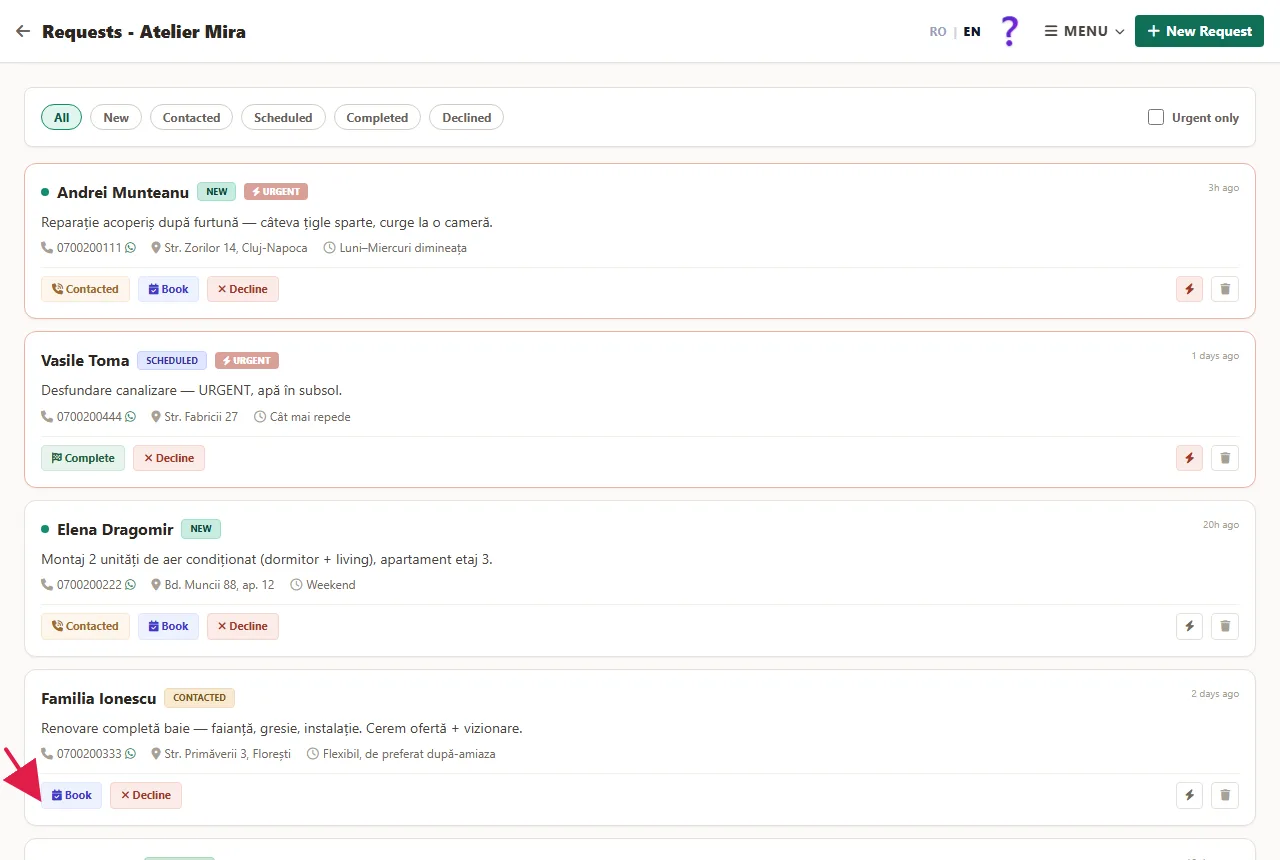
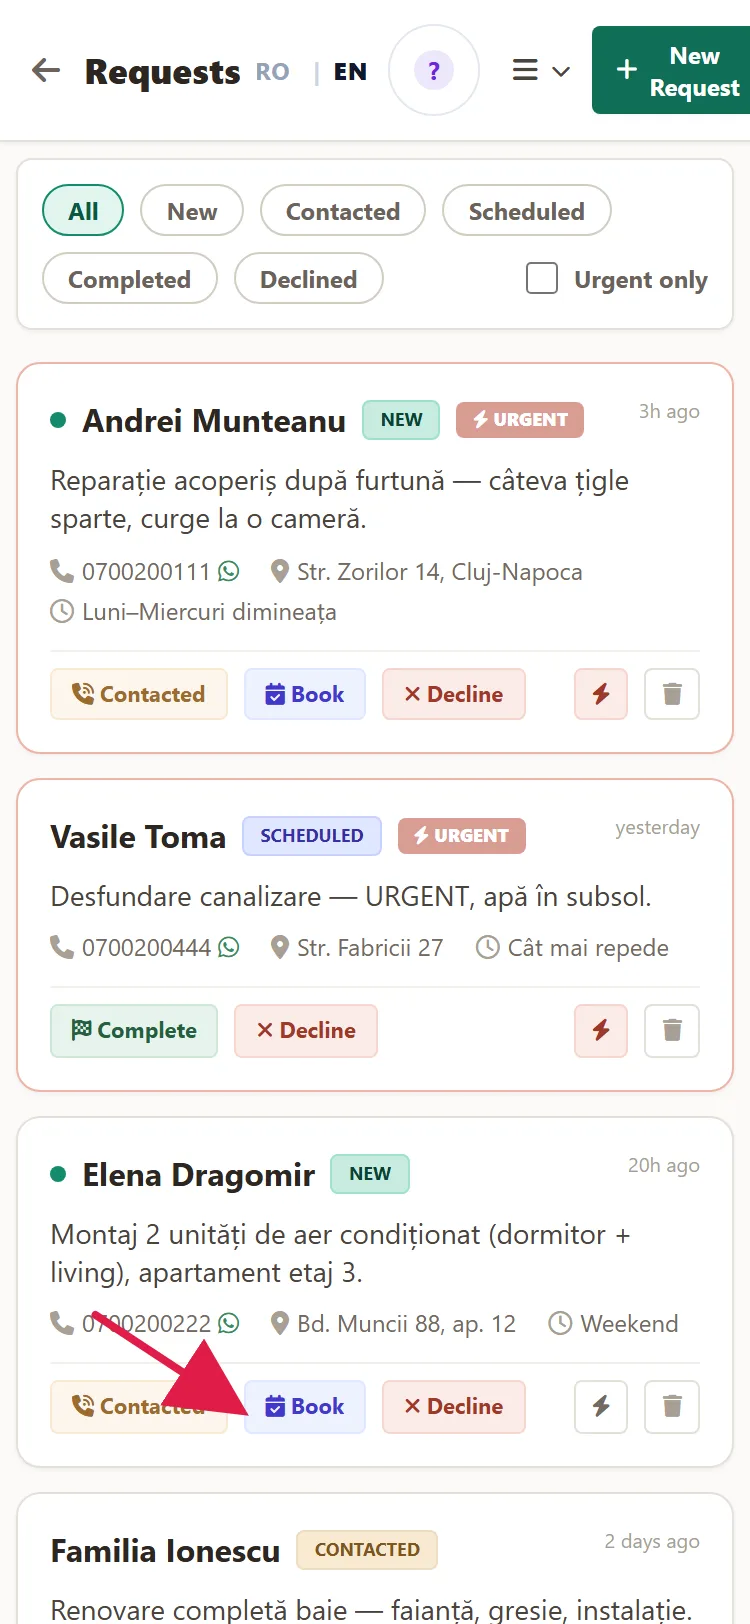
- Choose the services, the day and the time, then click Save. The request moves to "Scheduled".
- You add a request you got by phone with New Request.
What you see in "Today", in your website's admin panel
- How many appointments you have today and tomorrow, with the time, the client and the service. Those not yet confirmed have the "to confirm" label.
- How many appointments are waiting for your confirmation, from today on.
- Under "Bookings this month": how many appointments you've had from the start of the month until now, how many were canceled, and the most requested services and times.
- All Appointments → takes you to the 7-day list, in your website's admin panel.
Common problems
- "I got an appointment email, but I don't see it under New." "New" shows only the appointments you haven't opened that came in since yesterday evening (8:00 p.m.). Look for it in the calendar, with Appointments › Pending.
- "The client says they didn't get the confirmation or cancellation email." The "Confirmations to clients" switch is off, or the client didn't leave an email or typed it wrong. Turn on the switch from Menu › Email Notifications, correct the email from Edit or call the client.
- "I don't get an email when an appointment comes in." The "Notifications to me" switch is off or the address is wrong. From Menu › Email Notifications, turn it on, type the address and click Send Me a Test Email.
- "The time I want isn't on the list." Either you haven't chosen the specialist, services and day yet, or the time is taken ("No free slots" appears). Fill in the fields or choose another day or another specialist.
- "I canceled by mistake." A canceled appointment can't be restored. Add it again with Add and let the client know: if they had an email, they've already been told about the cancellation.
- "The Bookings panel asks me for a password" or "The sign-in link has expired". Go back to your website's admin panel and click Bookings Panel ↗ again. If it still asks, sign in with your account's email and password. If you forgot the password, write to us at contact@webid.ro.
- "The booking form doesn't appear on my website." The Online booking is on switch is off. Turn it on from ⚙ Set-up and click Save.
- "Today says the appointments couldn't be loaded." The connection to the Bookings panel didn't work at that moment. Nothing is lost: you can see them in the Bookings Panel ↗.
- "This month's appointment number is lower than in the calendar." Only appointments up to now are counted, without the canceled ones, and the number updates once an hour. That's normal.
- "I have many canceled appointments, even though I didn't cancel anything." Requests you declined with Cancel also count as canceled. That's normal.
- "I don't see Accounts and My Data in the menu." You signed in with a front desk account. The owner can change your role from your website's admin panel.
- "Something else isn't working." Write to us at contact@webid.ro and we'll take a look.
What it doesn't do
- You can't drag an appointment with the mouse in the calendar: you move it from Edit.
- An appointment you add yourself doesn't email the client when you create it, even if you save it directly as Confirmed.
- There's no delete button. A canceled appointment disappears from the calendar and can't be reactivated: you add it again.
- New shows only the appointments that came in since yesterday evening; "Today", in your website's admin panel, counts all pending appointments. The numbers can differ.
- Services, the team, your hours, holidays and the way appointments are confirmed are changed from your website's admin panel, not from the Bookings panel.
- Under "Requests", changing the status and Decline don't send the client anything.
- The package has room for 50,000 appointments and 10,000 client records. If you get close to the limit, the panel tells you in advance; at the limit, Add stops, but appointments from your website keep coming in.
What data it uses
Appointments and requests keep what your clients leave you: name, phone number, email, address (for at-home services), their message and your notes. They're stored in the app's database, on servers in Romania, and only you and the accounts you create can see them. The specialist gets only the client's name by email, unless you choose otherwise. Records are kept for the period you choose under "My Data" (1, 2, 3 or 5 years from the last visit, 5 by default), then anonymized after 30 days' notice, and the copies of sent messages are emptied after 90 days. The details are in the data processing agreement, §3.