How to change the photos on your website
Your own photos look better than any starter photo. You change them from the admin panel: a page's top photo, the photo of each service, the team photos and the gallery. Every path leads to the same image library of your website, so a photo you upload once can be used anywhere.
How to upload a photo to your website's library
- Wherever you change a photo, the Images window opens, with the photos on your website.
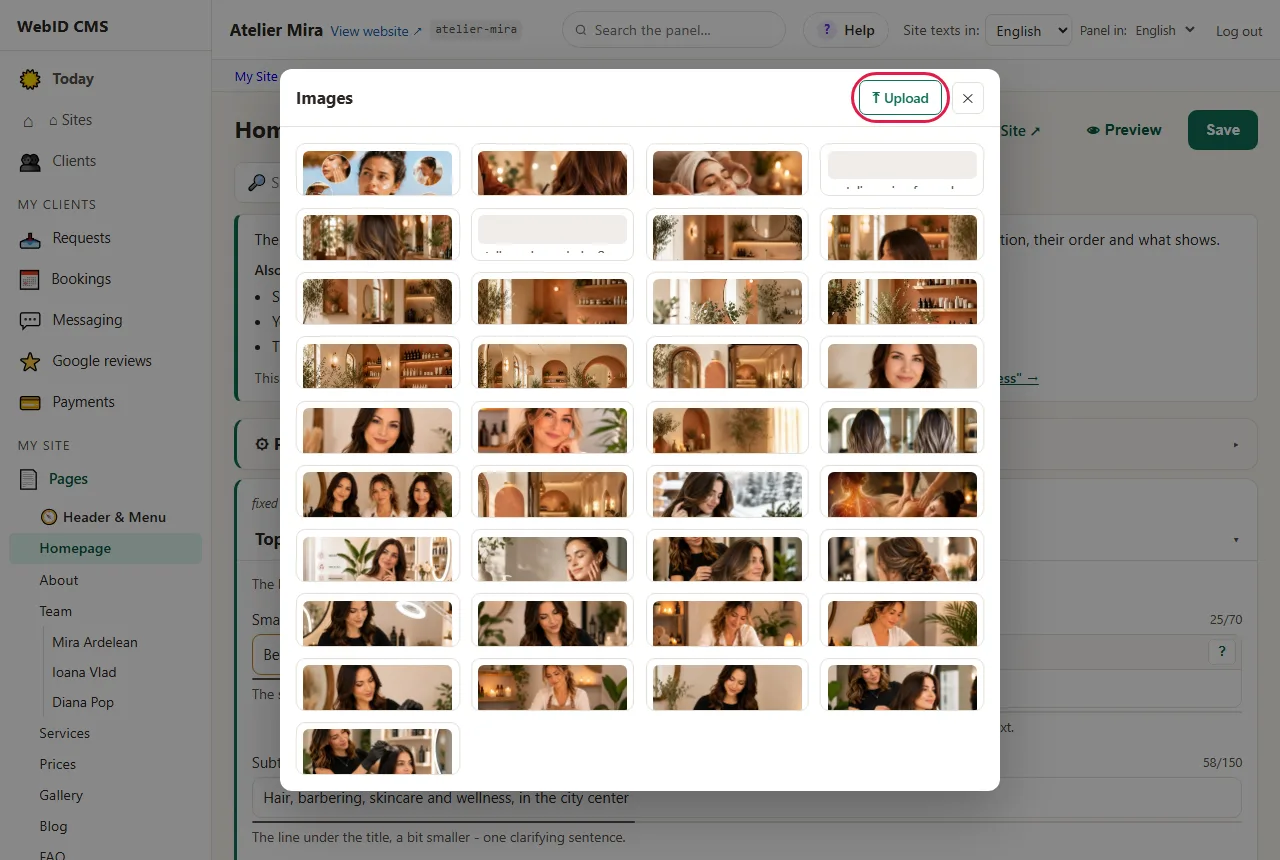

- To pick a photo you've already uploaded, click it.
- To add a new one, click ⤒ Upload and choose the file. JPG, PNG, WEBP, GIF or SVG photos work, up to 8 MB each.
- Changed your mind? Click Close.
When you upload, we shrink JPG, PNG and WEBP photos to a size that suits your website and compress them, so the files are smaller and the page loads faster, on phones too. GIFs and SVGs stay as they are. At the same time we remove the data hidden in the file: the date, the device you took the photo with and the location (GPS). If you took the photo with your phone held upright, it shows the same way on your website. If you want your photos at their full size (for example, for a photographer's portfolio), go to Settings, under Uploaded photos, and check "Keep photos exactly as you upload them (no resizing)". With that box checked, the photo is no longer shrunk or compressed, but the hidden data (and the location) is still removed, and photos taken upright may appear sideways.
How to crop a photo
After you pick or upload a JPG, PNG or WEBP photo, the Crop the photo window opens.
- Move and resize the frame over the part you want to keep. You choose the shape: Free or a fixed format.
- Click Crop and Use. If you want the photo as it is, click Use the Whole Photo.
The whole photo stays in the library, so you can crop it again differently: click ✂ next to the photo in the field.
How to change a photo right on the page
- Open My Site, then Pages, pick the page and click ✎ Edit on Page.
- Click the photo you want to change. The Edit element window opens.
- Under Image, click 📷 Change.
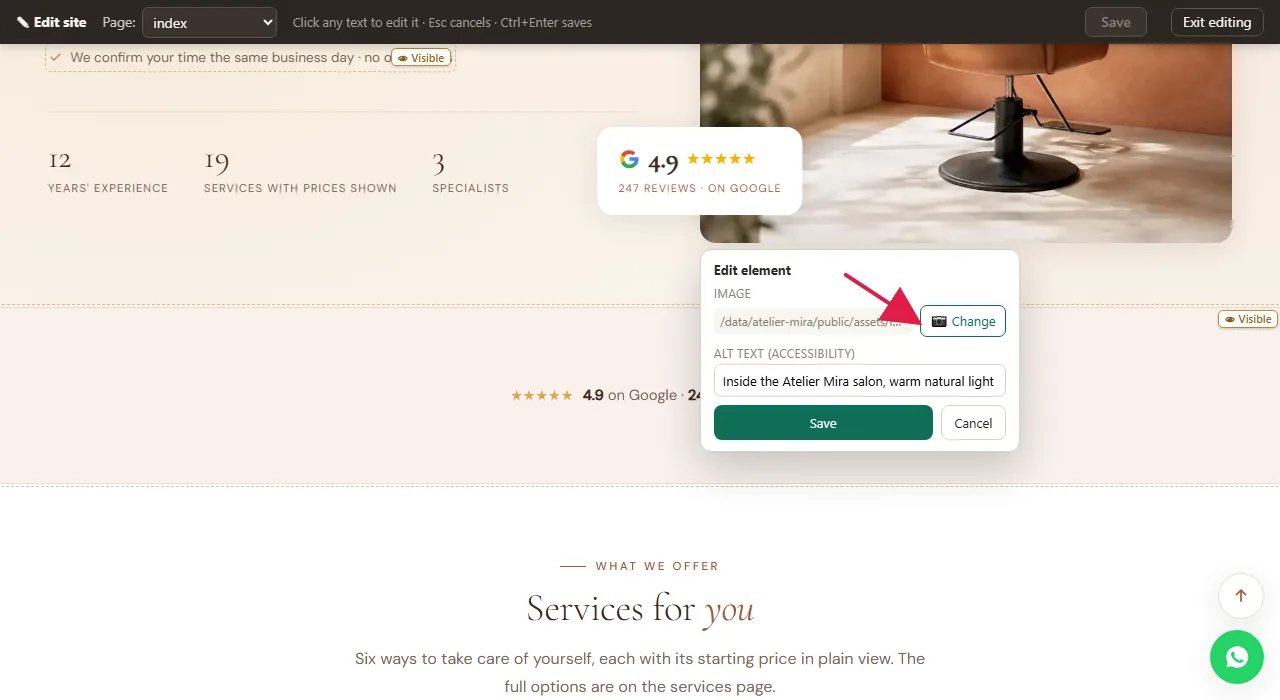
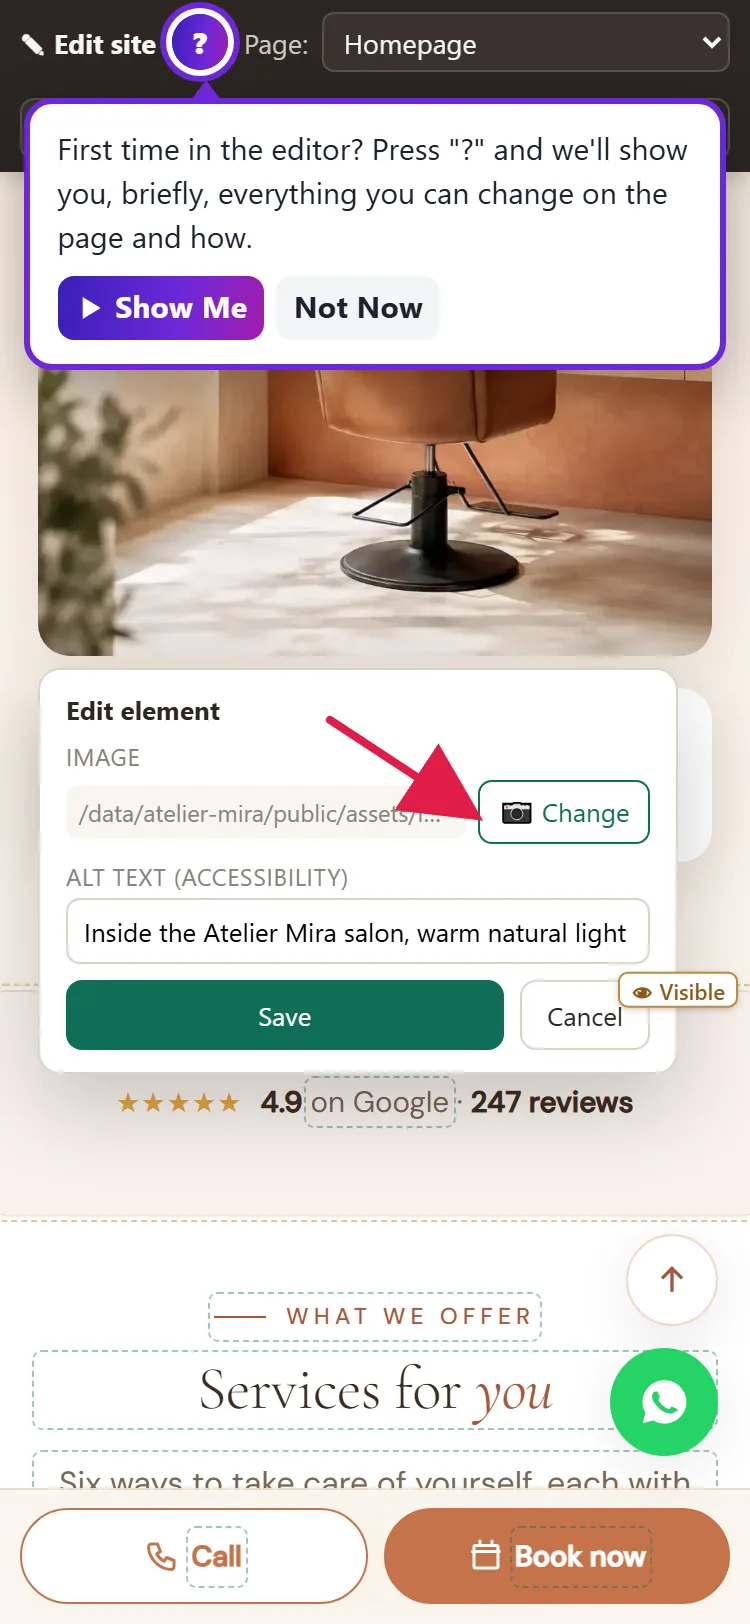
- Pick or upload the photo in the Images window.
- If you want, type under Alt text (accessibility) what the photo shows, in one short sentence. Screen readers read it aloud for people who can't see the photo.
- Click Save, in the window.
- Click Save, in the top bar (the number next to it shows how many changes you have to save). Only now does the photo appear on your website.
How to change a page's top photo from the form
- Open My Site, then Pages, then the page.
- At the section's image field, click 🖼 Choose / upload image.
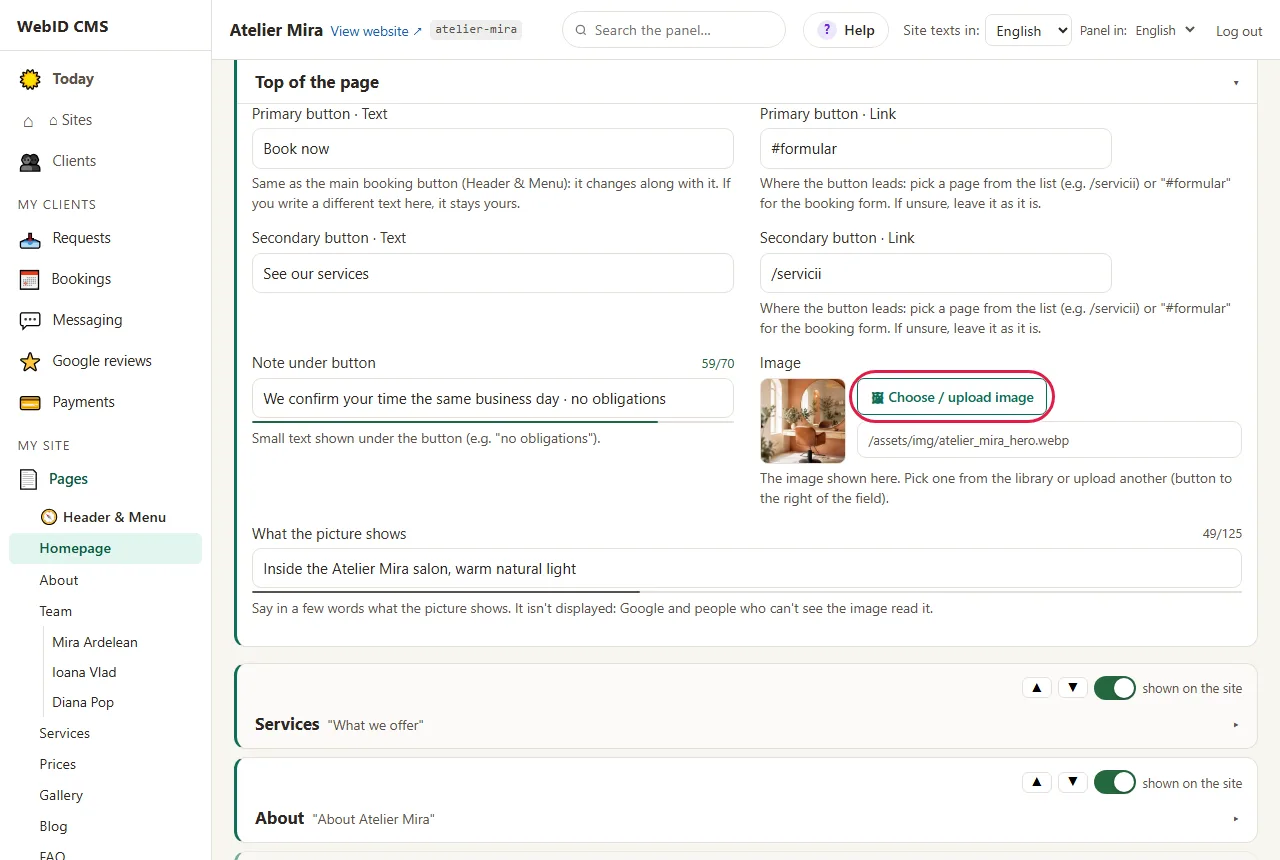
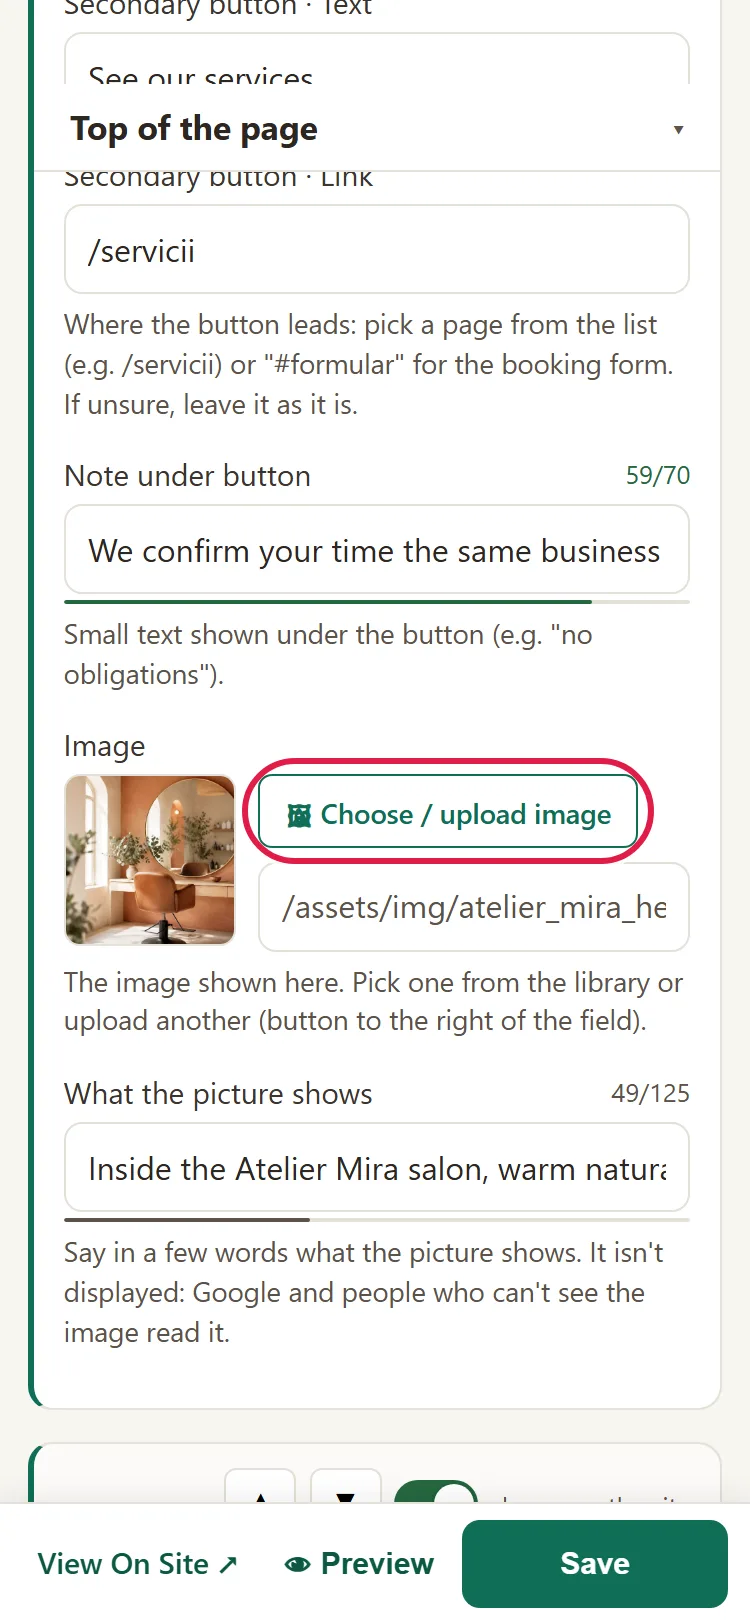
- Pick the photo. The thumbnail in the field changes.
- Click Save.
How to add the photo of a service or a colleague
- Open My Business, then Services & Prices (or Team).
- On the row of the service (or the colleague), click the photo square. If the service doesn't have a photo yet, the square says + Photo.
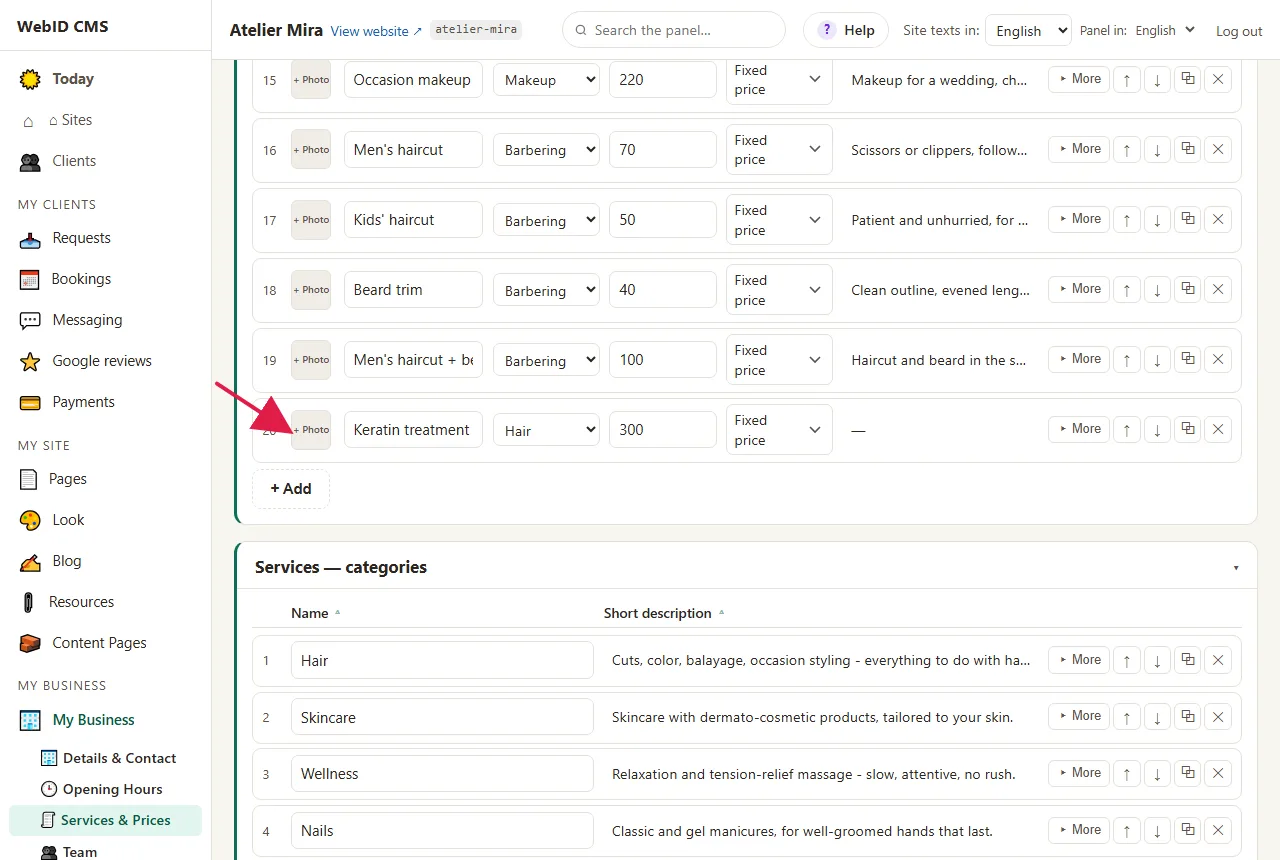
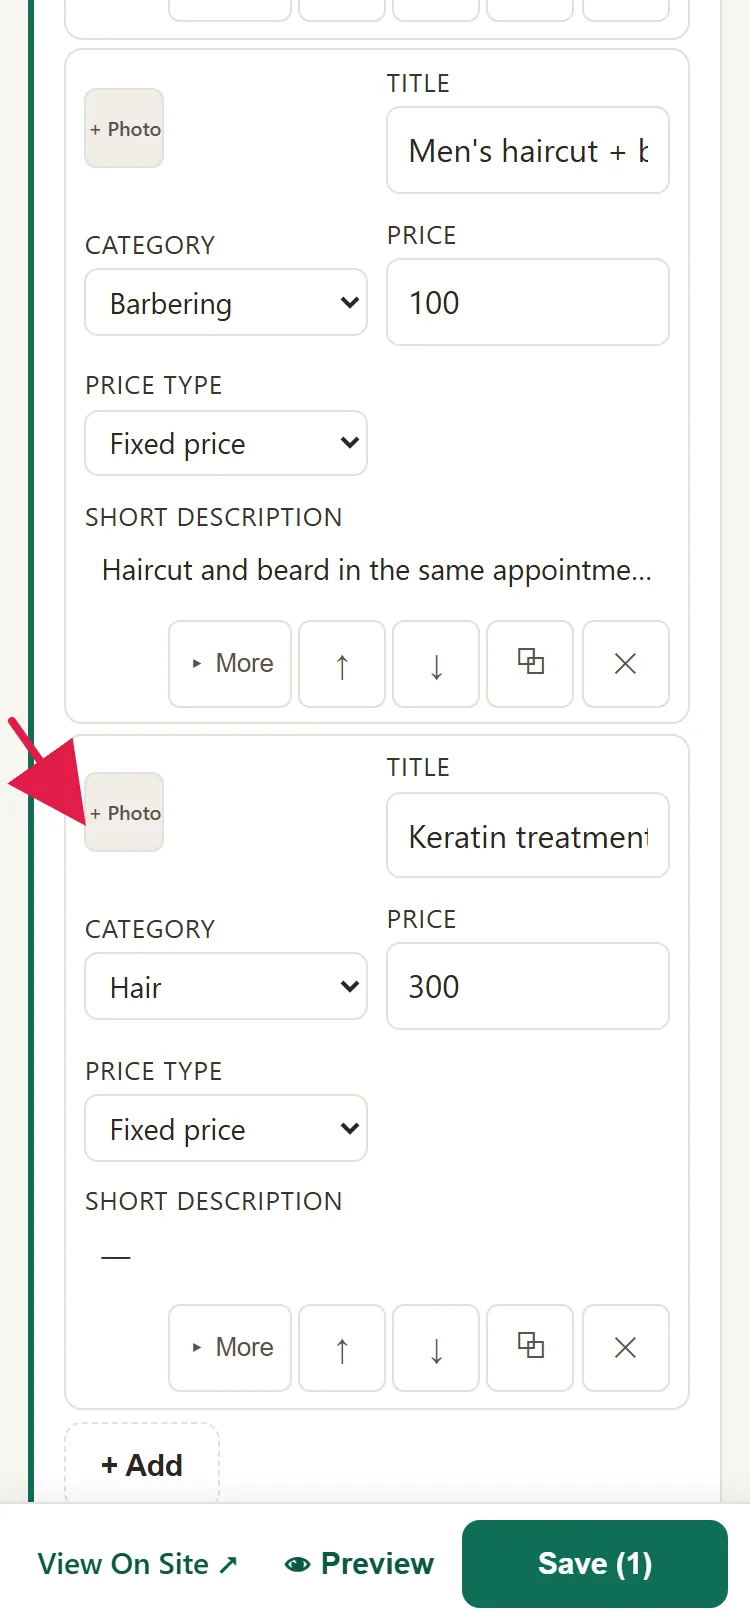
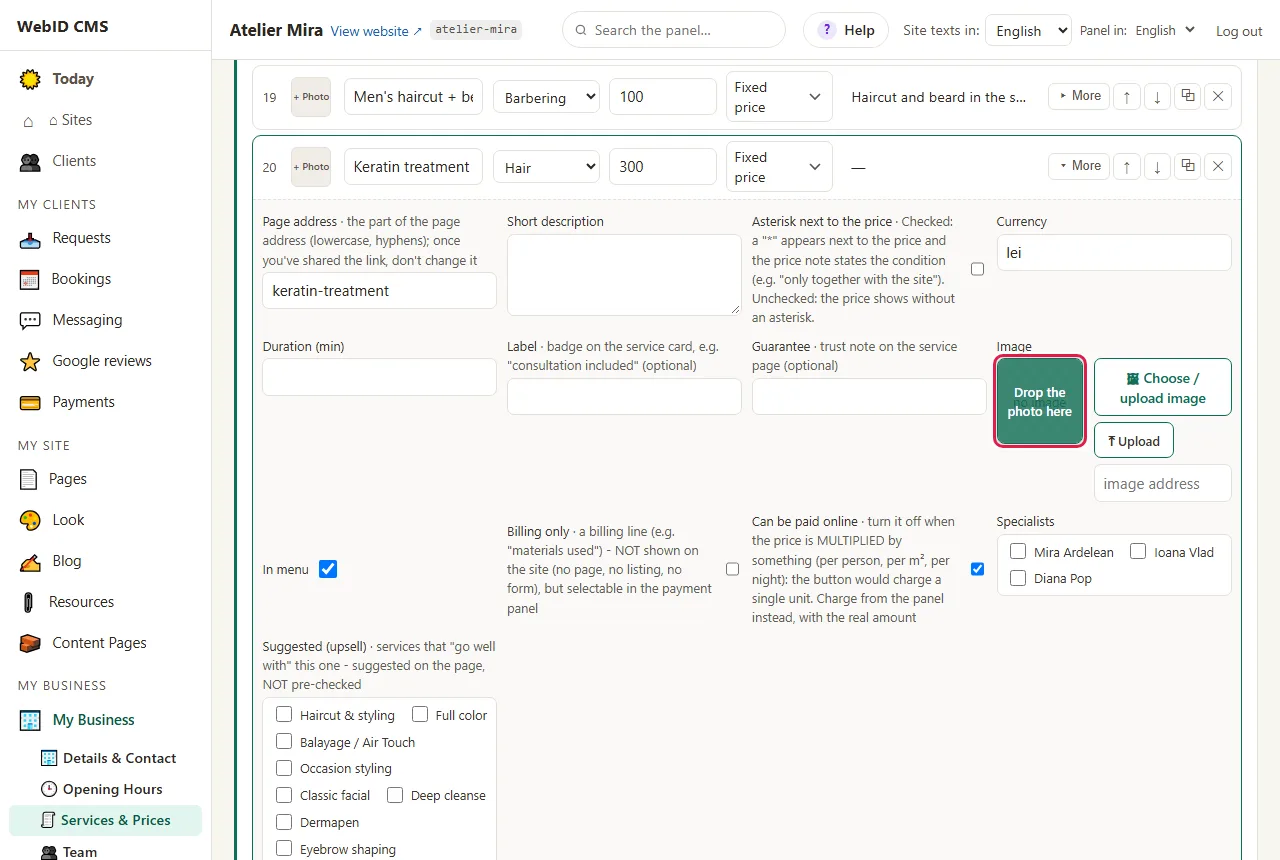
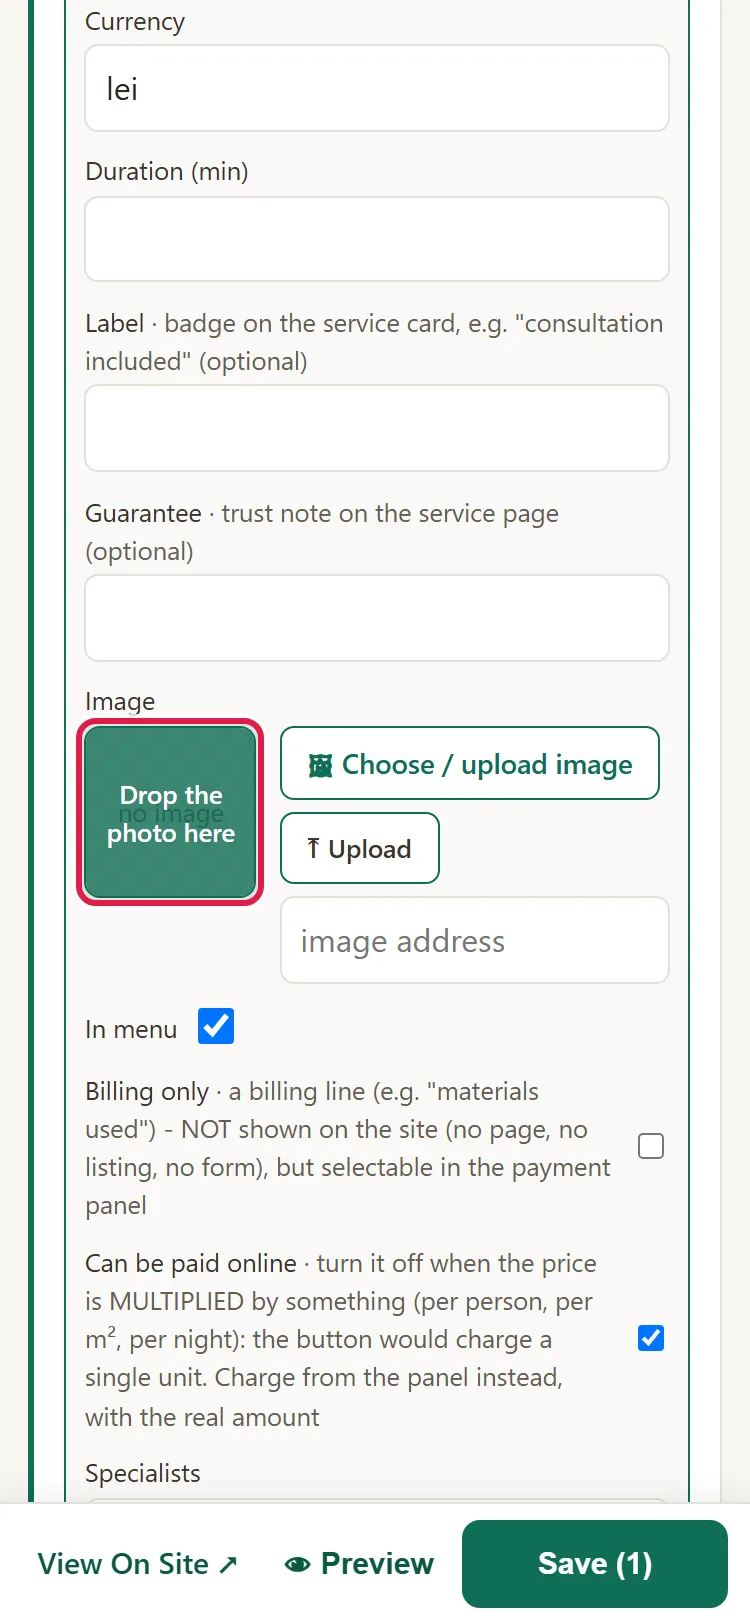
- The row opens and you see the Image field. You have three ways: click the thumbnail and pick from the library; drag a photo from your folder onto the thumbnail ("Drop the photo here" appears); or click ⤒ Upload and choose the file directly.
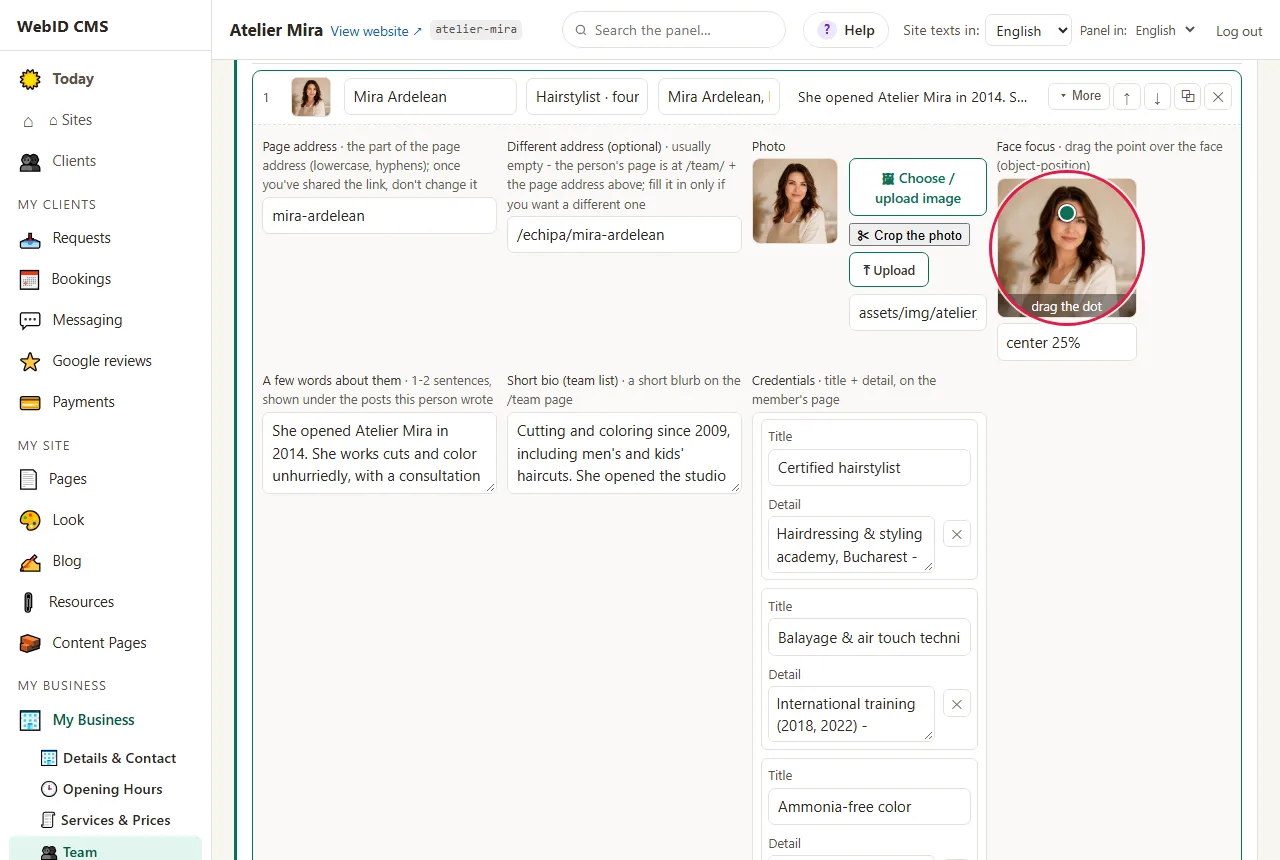
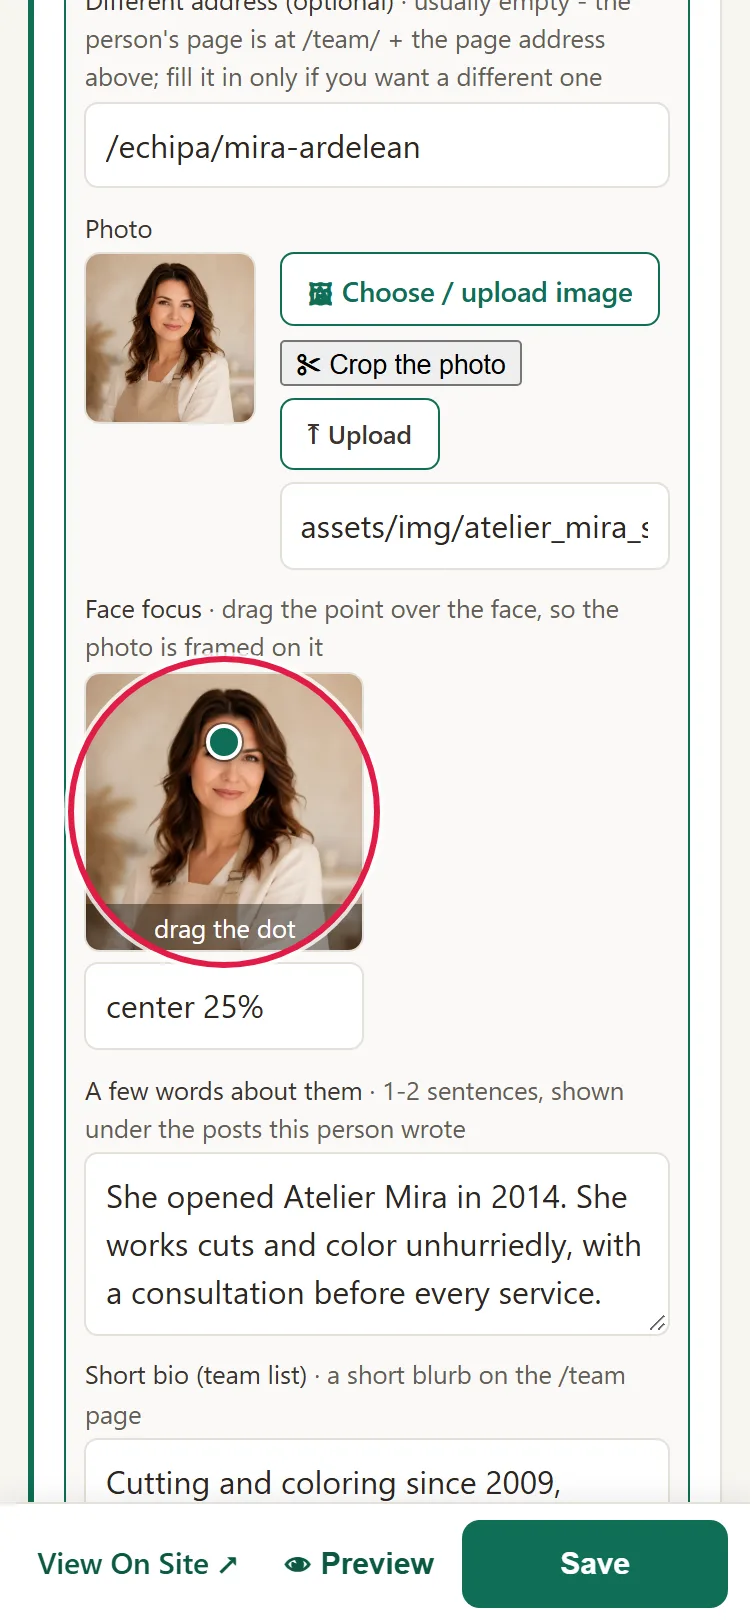
- For team photos, also use Face focus: drag the dot over your colleague's face, so the photo is cropped correctly in circles and on cards.
- Click Save, at the top.
How to add photos to the gallery
- Open My Site, then Pages, then Gallery.
- Under Lists on this page, open the list with the gallery images.
- Click + Add, then pick the photo and, if you want, type the alt text, the caption and the category.
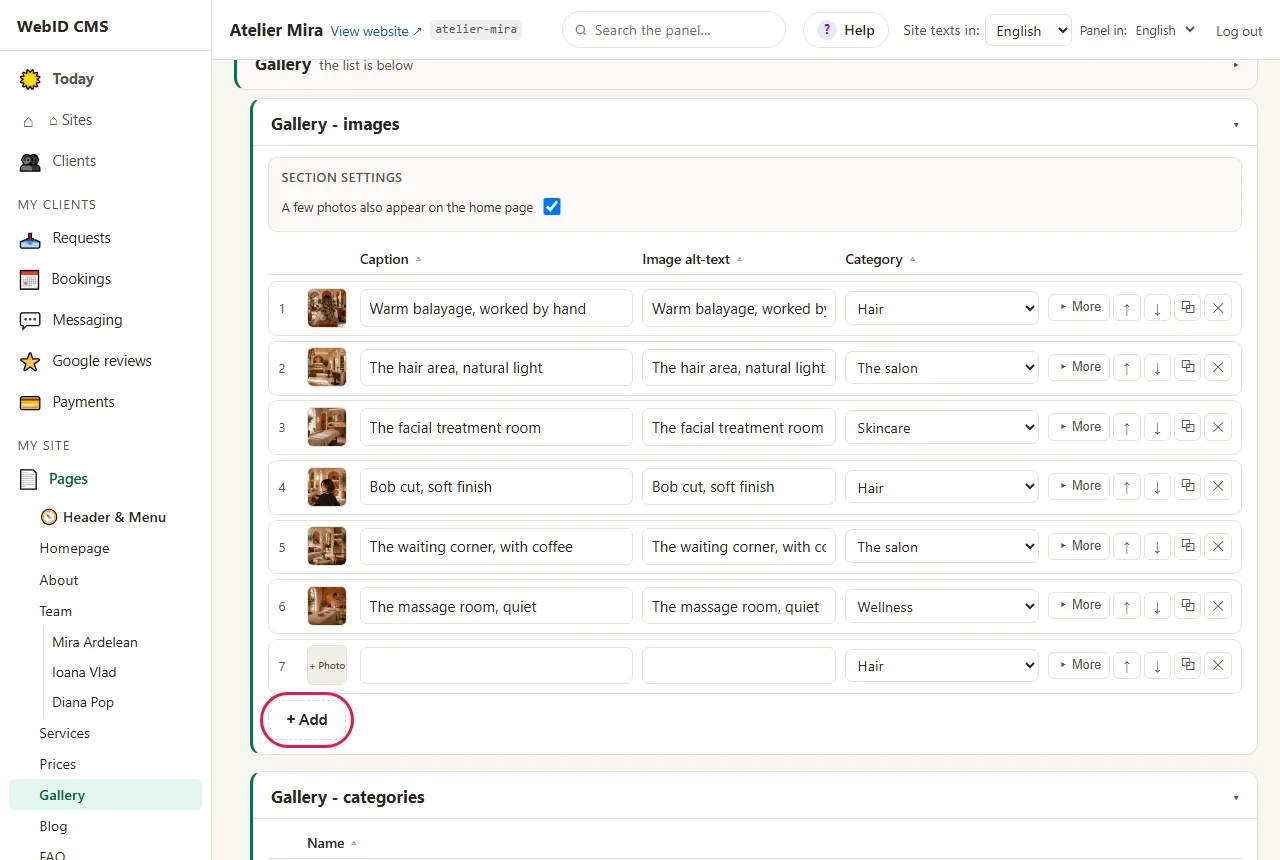
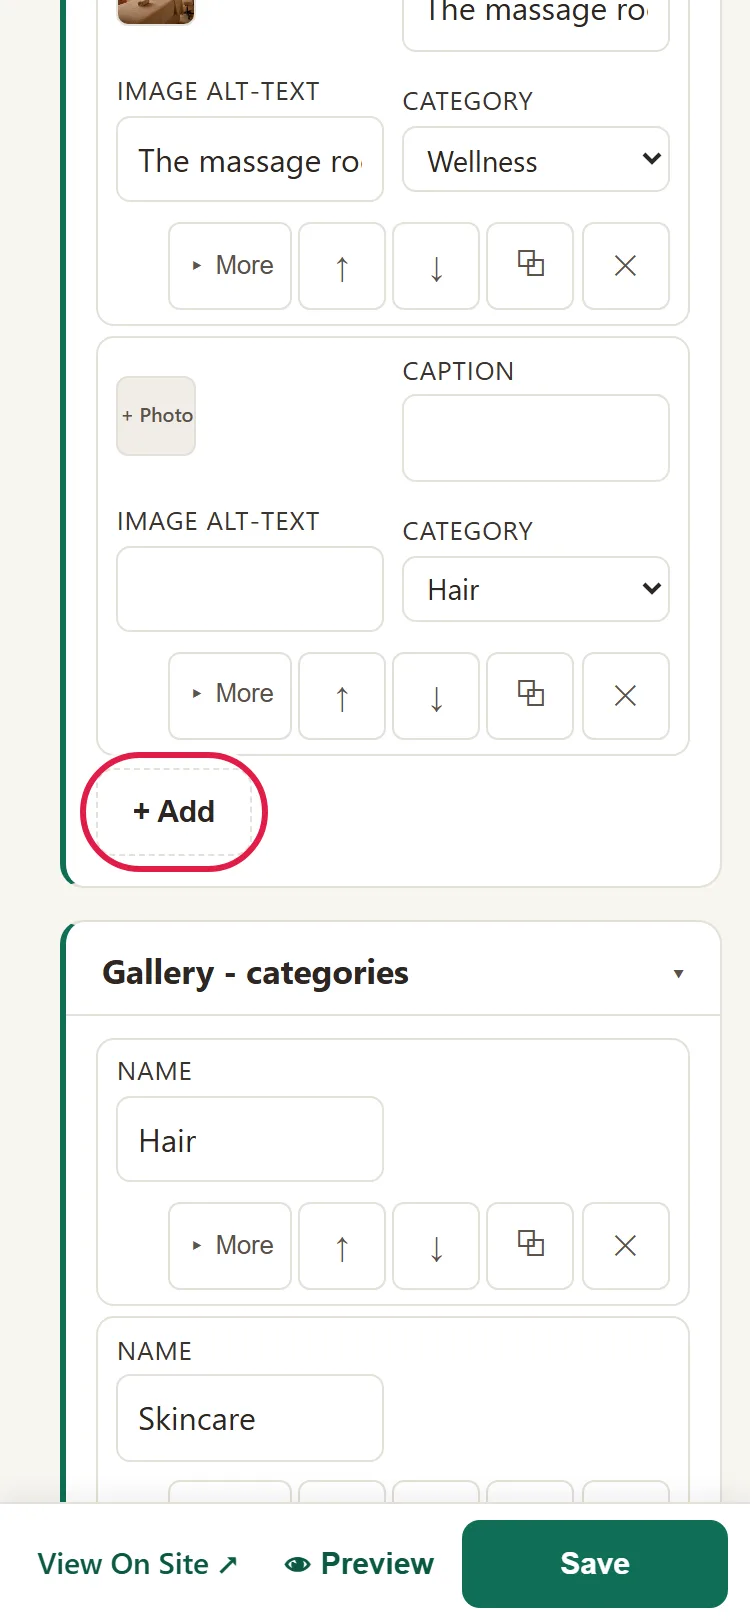
- You change the order with ↑ ↓, and you take a photo out of the gallery with ✕.
- Want a few photos on the home page too? Under Section settings, use "A few photos also appear on the home page".
- At the end, click Save on the list: all the changes above are kept only now.
Common problems
- "Image too large (max 8 MB)." The photo is over 8 MB. First send it "in small size" from your phone or shrink it with any photo app, then upload it again.
- "Unsupported type." iPhone photos are sometimes saved in the HEIC format, which the website doesn't accept. Save the photo as JPG and upload it again.
- "Invalid or unsafe SVG." Your SVG logo contains elements we don't accept. Use it in PNG format.
- "I added the photo, but my website still shows the old one." You didn't click Save, or your browser is showing you the earlier page. Save, then reload the page of your website.
- "It says: image not found." The file in the field no longer exists. Pick another photo from the library or clear the field.
- "My colleague's face is cut off in the circle." Move the Face focus dot over their face and save.
- "Something else isn't working." Write to us at contact@webid.ro with what you see on the screen and we'll take a look.
What it doesn't do
- It doesn't rotate photos in the admin panel.
- Photos can't be renamed and can't be deleted one by one. The ones no page uses anymore you delete all at once, from the Images window, with Delete Unused Photos. After deleting them, you can't recover them from the admin panel.
- If you bring back an older version of your website from "History", the pages show the photos from back then again; the files in the library stay.
- It doesn't make new photos for you (for example with artificial intelligence).
- The logo isn't set here: you'll find it in My Business, under Details & Contact. The emblem and what appears at the top of the pages (photo, emblem or nothing) you choose in Look.
What data it uses
The photos you upload are shrunk (unless you turn that off in Settings) and lose the information hidden in the file - the date, the phone and the place where they were taken - before they reach your website. They're stored on your website's server and are included in the backups; if you want a photo gone for good, write to us. If people appear in the photos (your team, your clients), you ask for their consent - see DPA §3, the "Website + hosting" row.